The Turbo S comes mostly assembled in a large sturdy box from Specialized that also has plastic support handles in lieu of simple cardboard ones since it still does weigh about 48 pounds. The battery is separately packaged in the box in additional cardboard and usually has a decent charge right from the start. I always un-package it and plug it into the included AC charger so it is at full charge once the bike is ready to ride.
The handlebars and stem need to be installed onto the steerer tube of the fork ) appropriately spaced with the right amount of spacers. Once this is done, any remaining packaging is recycled and removed.
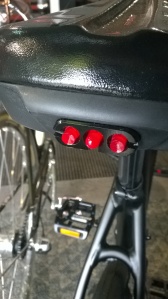
The seatpost is installed with grease (for alloy) and fiber grip paste (for carbon on the older models). Right before install the two wires coming from the saddle’s LED need to be connected to the opposing two wires coming from the seat tube. One of each set will have a blue line on it. Connect those two and then connect the other two. Coil the additional wire into the seatpost as you mount it into the frame. Torque the seatpost binder bolt to a value of 5Nm. Clamp the bike in the stand with moderate pressure to hold the bike firm while finishing the build and tuning.
The Turbo S uses a MegaEVO386 bottom bracket and compatible crank (30mm spindle). I remove the crank and use a torque wrench to check the outboard bearing bottom bracket cups to 40Nm. I then make sure to use a thicker grease on the spindle before installing it into the BB. This helps ensure that there are no creaking or clicking issues. Most of the time, I find that the factory build installs it correctly and I have to just double check it.
I then take both wheels off of the bike. The front is a thru-axle as is the rear wheel. Both are necessary to adequately support the wheel in the frame. After greasing the thru-axle and checking to make sure the cassette lockring is tight, I true and tension both wheels. Nearly every time I find the wheels are already well-built and simply detension the wheel from shipping and production and lubricate the spoke nipples.

After getting the wheels ready, I like to take care of a few things on the bike that is easier to do without the wheels on. I wipe the frame down with rubbing alcohol at all points of contact between parts and components. For instance, this would include crank arm pedal threads, both front and rear dropouts, all frame fitting contact points (where cable and wires enter and exit the frame), brake calipers (with pads removed), handlebars, the surface area under the grips, and the rotors on the wheels. Then the wheels are installed and torqued to the required spec with a torque wrench.
At this point the handlebar is installed, the bottom bracket checked, the wheels checked and trued and cleaned, and the frame is prepped. After the wheels are installed, it is time to center the brake calipers on the rotors. At this time, it is also suggested to toque the rotor bolts to spec as well (3.5-5Nm). Loosen the top and bottom mounting bolts for each caliper and until they move freely back and forth. Normally there is blue Loctite on these bolts. If none is present, apply some. Then, with the mounting bolts loose, use one hand to press down on the caliper body and with the other hand, squeeze the brake lever. Slowly snug down the top and bottom mounting bolts until the body does not move easily. Release the brake lever and place a white piece of paper below the caliper and rotor. You should be able to easily see the space on each side of the rotor from the pad. If it is uneven, slightly loosen each of the mounting bolts and center the pads over the rotor. Once this is done, tighten and torque the bolts to spec and spin the wheel. Listen for any sound of rubbing and observe that the rotor is true and straight.
Shift through the gears in the rear until the chain is positioned in the largest cog (the lowest gear). Set the LOW limit screw so that the derailleur may very slightly go past the last cog (about a half of a millimeter). Then, down shift and use the barrel adjuster to correct the cable tension for the smoothest shifting. Once the chain is positioned in the smallest cog (the highest gear), adjust the HIGH limit screw so the chain is in line with the cog.
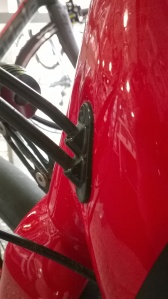
Now that the ‘bicycle’ parts have been checked and tuned, it is time to install the frame fittings the wires enter and exit. These are small 2mm hex bolts that should have a small amount of blue Loctite on them. If they don’t apply some. Avoid using a ball head hex key to install or remove these as it tends to either strip the bolt head or simply not apply enough bite to turn the bolt.
Check the rubber pad in the frame slot for the battery to make sure it is flush against the base of the panel and is covering the wires that run the length of the down tube. Then, clean the contact points at the top and bottom of the battery slot and on the battery with isopropyl alcohol and place the battery in the frame bottom side first. When the top half connects into the frame, you should hear a distinct click, indicating the battery is installed correctly. Attempt to wiggle the battery to ensure it is installed right and test its removal by turning the key located near the bottom bracket on the non-drive side. Keep this key handy at all times! It is ridiculously hard to remove the battery without the key.
With the battery installed, the Turbo is ready to rock! Press the power button on the battery to start up the system. Now on to the electronic parts and diagnosis!
– SNC


One thought on “Specialized Turbo Parts Installation”