How To Properly Set Up A Cantilever Brake

Today I am going to share my best method for setting up a cantilever brake.  I do not believe in ‘toeing’ the brake pads (except maybe on a painted rim), which greatly reduces the effective power and gives the brake lever a really mushy feel.  With a few small tricks, your cantilever brakes will feel solid and powerful (as they are meant to be) and won’t squeal either.  Let’s begin.

Here is an example of a fairly standard TRP cantilever brake.

cantilever-brake

It actuates from the top by the brake cable, which is attached to a straddle wire reaching down to each brake arm.  When the brake lever is pulled, both sides move inward and apply pressure to the braking surface on the rim.  As you can see on this model, the left side has a convenient barrel adjuster built in at the top of the arm.  A barrel adjuster somewhere in the line is essential to this setup (which you will understand further down).  If your cantilever brake doesn’t have one of these, I suggest installing an inline barrel adjuster somewhere in the cable housing routing.  An inline barrel adjuster example is below as well as a cantilever brake hanger, which is mounted between two of the headset spacers at the end of the cable housing route.

inline-barrel-adjustercanitlever-brake-hanger

Either of these three barrel adjuster options will work great, but I don’t suggest having more than one (redundant). The first step in this process is giving the straddle wire the correct angle in reference to the brake arm, shown below.  A 90 degree angle is the most optimal for this style of brake.  However, there are wide position cantilever brakes that do not follow this rule precisely.

cantilever-90-degree-image

A narrower angle or wider angle will degrade the performance of the brake.  I have seen some cantilever brake hangers that mount at the bridge of the fork that aids in reducing the shuddering experienced in the front brake, but most designs give ample room for the 90 degree angle.  Once this part has been set up correctly, take a look at whatever style barrel adjuster you have and unthread it about 2/3 of its total capacity, shown below.

barrel-adjuster-two-thirds

The last third of the barrel adjuster should still be threaded in.  As you unthread the adjuster, notice how the brake will begin to tighten and close.  By extending the barrel, you can provide adequate clearance for the brake pads and this will be the key in setting up the pads properly.  With the barrel adjuster extended 2/3, loosen either the 4mm or 5mm anchor nut for the brake pad.  Some cantilever brakes use a 10mm hex nut to hold a post style brake pad. The arrows point to each mount style.  The 10mm hex nut in the second image is on the back side of the brake arm.  Both examples shown below.

4mm-cantilever-padpost-style-cantilever-brake-hex-nut-example


Once loosened, the post style brake pad can be moved inward or outward and at about any angle.  In the 4mm (or 5mm) style, make sure that you have extended the barrel adjuster so the brake pad touches the rim, since it cannot move inward or outward (only angled up or down).  Using one hand, press the brake pad against the rim flush and parallel.  It should look like the brake lever was pulled when the brake pad hits the rim.  This sets up the proper contact of the brake pad to the rim.  Some style of brake pads have an angled back edge to aid in reducing noise (a second reason why toeing is not really necessary).  Example below.

angled-pad-with-arrow

With your one hand holding the pad against the rim, tighten either the 4mm (or 5mm) nut or the 10mm hex nut (post style) and keep an eye that the pad does not move.  Sometimes, an improper setup in the past can create an indent in the spacers and that will make the pad ten to want to go back to its skewed position.  If this happens, use greater force to hold the pad and try again until it is parallel with the rim.  Now, above I mentioned that the barrel adjuster (extended two-thirds) was the key to all of this.  Well, this is it.  Thread the barrel adjuster back in and watch as the clearance between the brake pad and rim expands.  This gives you the preferred modulation and spacing of the pad in reference to the rim.  Some people prefer a really tight pull of the brake lever and can thread the adjuster back in only partially.  Some people like a little more modulation and thread the adjuster back in all the way.  You should have several mm of spacing between the brake pad and the rim so that, if your wheel is out of true after riding for some time, the rim will not hit the brake pad.  Experiment with how much to thread the barrel adjuster back in until the brake lever actuation is to your liking.

Lastly, it is good to apply a bit of triflow to the spring and pivot point on the brake arm so that actuation is smooth.  It is a bit of preventative maintenance that will keep your brakes working great throughout the season.  As your brake pads wear down, you can extend the barrel adjuster (unthread) to regain the correct clearance as the initial setup.  Lubrication points shown in the example below.

cantilever-90-degree-image-lube-points

As always, I welcome any other tips you may have from your own setups and hope that my experience will help save time and frustration.  I have seen plenty of cantilever setups and this method seems to work the best to get the most out of your brakes. Even an inexpensive $20 basic Shimano or Tektro Oryx cantilever brake can feel exceptional when properly set up.  Thanks for reading!

  • SNC


New Shop Prospects and Tutorials

Hey everyone!  I have been on a nice hiatus while transitioning to a new shop in the area.  I am really excited about the opportunities happening and will be back to regular posts next month.  In the meantime, I have been developing material for tutorials on some of the newest technology in the industry.  It is a passion of mine to figure out solutions for products with little to no information on troubleshooting.  Many times in the shop I will be working with a new bike that has limited instruction from manufacturers and does not necessarily provide methods for effectively carrying out a build (aka the Venge ViAS).  Our shop spent a great deal of time figuring out the best setup for the front rim brake setup and how to eliminate (or at least reduce) the drag the cable would experience when actuated due to the complexity of the cable routing through the steerer tube out to the caliper arm.  Things like this, when solved, will help a great number of people avoid frustration and useless wasted time.  The beauty of it is that hopefully my efforts (both right and wrong) will lead to the most effective solution for the product.  Consequently, I have had many readers comment and provide additional information that further refines the solution.  Collaboration is the best way to make all of our lives easier in the shop.  I always welcome suggestions and other methods as I seek to find whatever is the best.

Compiling all of the information has really helped to use my blog both as a reference for myself and a place for people to detail problems they’ve had.  Even when I cannot provide the exact solution, pointing someone in the right direction (either a dealer or manufacturer) usually resolves it.  Real life problem solving in unknown situations is every bit as important as a torque specification or cable routing diagram.  This doesn’t just apply to high end products.  I find sometime even a cantilever brake can be as frustrating for someone as a wiring issue on an electric bike.

Some of the articles forthcoming will cover:

  • Proper cantilever brake setup (saw that one coming?)
  • Hub motor wheel lacing for electric bikes
  • Disc brake (break) squealing and bleeding difficult disc brake calipers
  • Situations where you need three hands for a project and only have two
  • Setting up tubeless tires on rims that just don’t want to seal during inflation
  • Carbon frame inspection for cracks and damage
  • Proper road shifter placement and why they should be where they are
  • Dropper post setup with internal routing
  • Modding components to accept unacceptable setups (like running an 11-32 cassette with a Di2 rear derailleur)
  • Bottom bracket solutions for BB30, PF30, and BB86/90 (creak creak creak, pop)
  • Updating Di2 firmware yourself (quite easy) and apps for power meter firmware and diagnosing these issues.  This may expand into more than one article.

I hope you’ll read the articles and gain some insight.  Any tips you may have that have been successful are encouraged and welcome.  Also, the articles will detail some of the failures I came across with methods before I was satisfied with the solution.  Thanks for reading! Oh yea, and here is my new cat Ernie.  He didn’t come with a manual unfortunately, haha.  He might be broken 🙂

15941015_10154639992391558_1529008311260796824_n

One gear at a time,

SNC

Two Nice Recent Builds

There have been a couple nice builds going out at the start of this fall season and I wanted to share a couple eye candy photos of them.  Even a short test ride displayed the ride quality top end components and frames have to offer.  Parts List after each set.

Specialized Venge ViAS Pro Disc –

Specialized Venge ViAS Pro Disc –

Shimano ST785 levers / calipers, Dura-Ace Derailleurs (Di2), Roval CLX60 Disc wheelset, Specialized Carbon FACT crankset

This is really neat to build since we had some challenging times with the rim brake model earlier in the year.  Once the front brake dilemma was figured out, it was a matter of following a series of steps, but the pre-routed lines through the frame wer only marginally difficult to correctly measure and feed through the stem and the handlebar.  The routing was pretty tight, but not kinked due to it being hydraulic rather than cable actuated.  The paint was really nice too with the minimalist fading of grey and black.

Pinarello Dogma F8 Team Sky Edition –

Pinarello Dogma F8 Team Sky Edition –

Shimano Dura-Ace Di2 Hydro groupset, Enve 2.3’s on Chris King R45 hubs with Sapim spokes, Centerline V2 rotors (6 bolt), Garmin Edge 820, Enve handlebars and stem, Arundel waterbottle cages, Dura-Ace pedals.

This bike felt so nice to take on the test ride before a final fitting.  It felt responsive and quick with a total sense of confidence in handling.  I felt zero ‘twitchiness’ and the wheels and frame absorbed the rough Arling pavement with ease.  The brakes can stop on a dime and still maintain a nice interval of modulation when descending.

Specialized Roubaix Future Shock

Hey everyone!  Quick post this morning about the new Future Shock from Specialized that is going on their Roubaix lineup and likely several other models (i.e. Diverge, maybe Crux) that I got a chance to build and ride the other day.  At first I was pretty skeptical about it and thought it was a lot like the proprietary suspension on a K8S Pinarello.  Obviously different components and placement, but the nagging concern that parts for this might not be available in a few years.  However, other than one particular part, I find that the shock will likely last as long as the bike and does comes with 2 additional springs (of different gauge) that could be used down the road.  The springs are really well built and the cartridge everything fits into is very well made and contained in a single unit.  Possibly this tech will evolve into something like a BRAIN shock.

Riding it felt great and I observed that the suspension accurately stayed in the middle of the travel while riding, so forces from the ground were smoothed out as well as pulling on the bar.  Even with this ‘smoothness,’ the bike felt agile and quick.  The disc brakes continued from the prior model were quick to stop and powerful (thanks Shimano).  Overall, my impressions are good on this.  The bike was really thought out and they redesigned enough features to make it a very noticeable performance improvement.

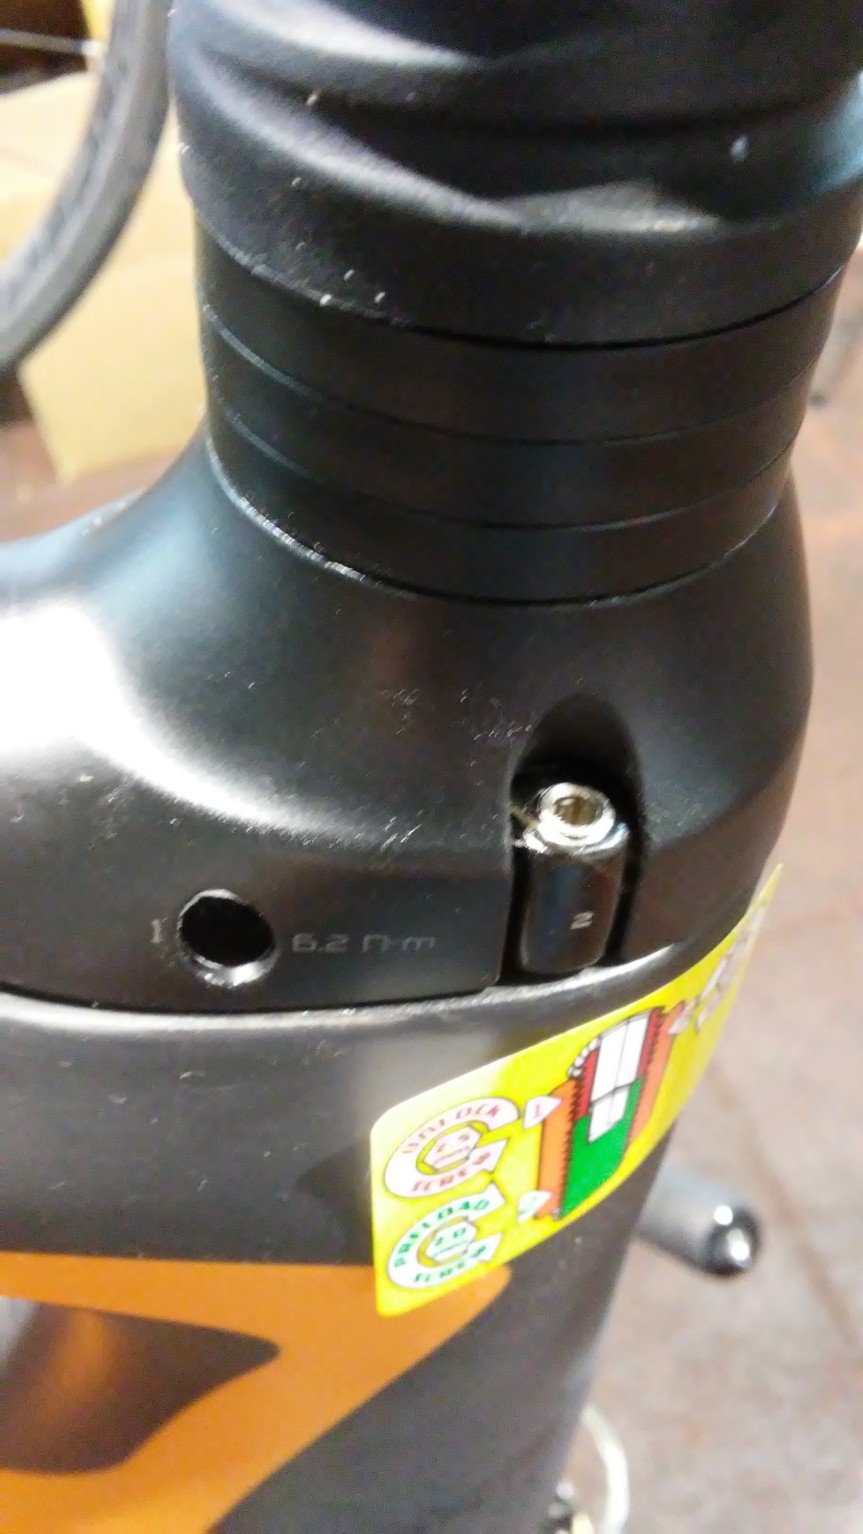
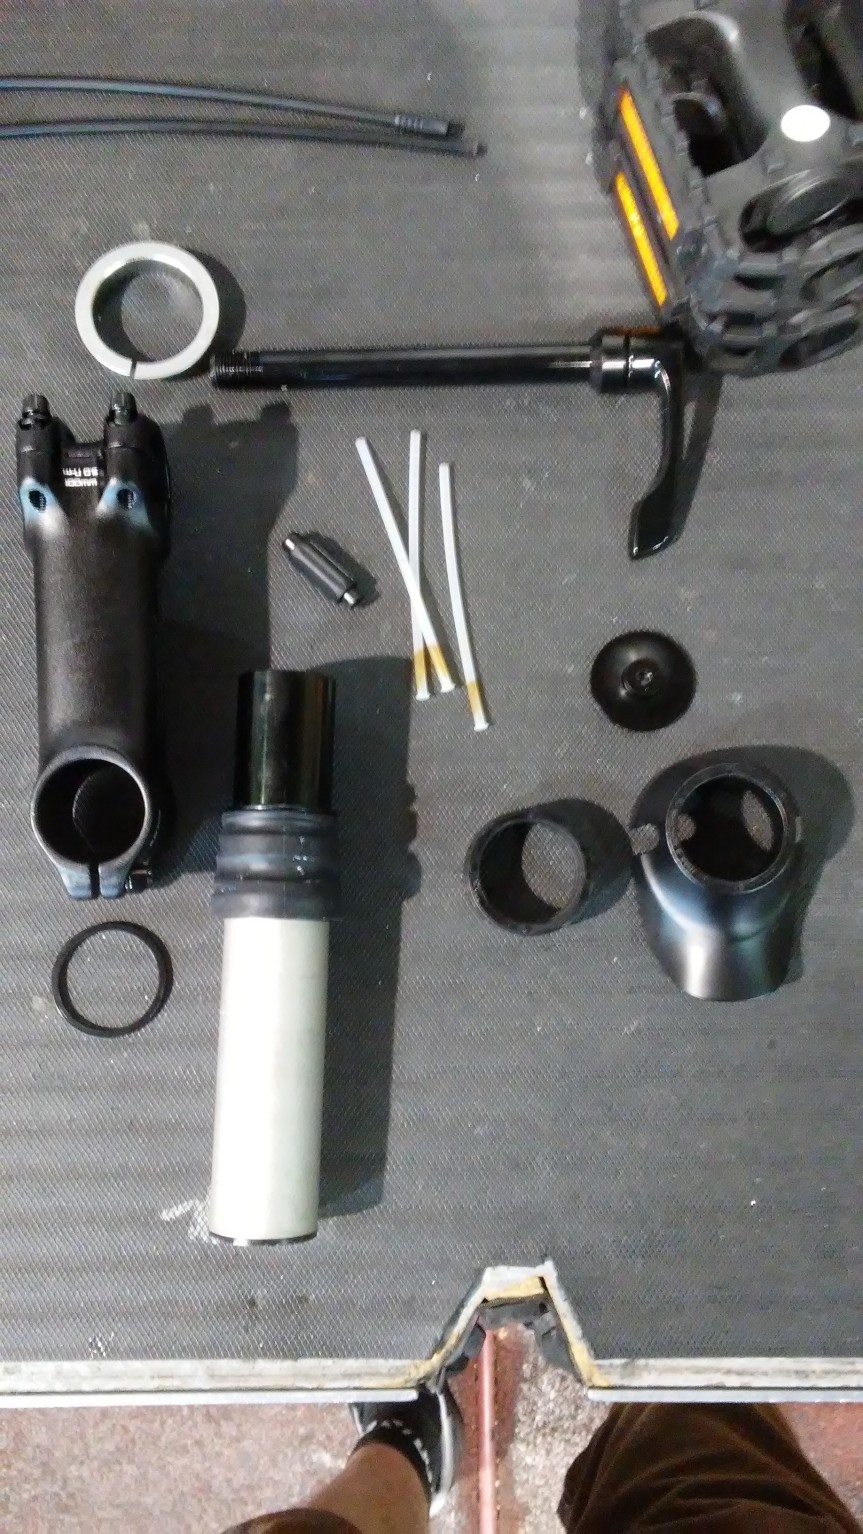
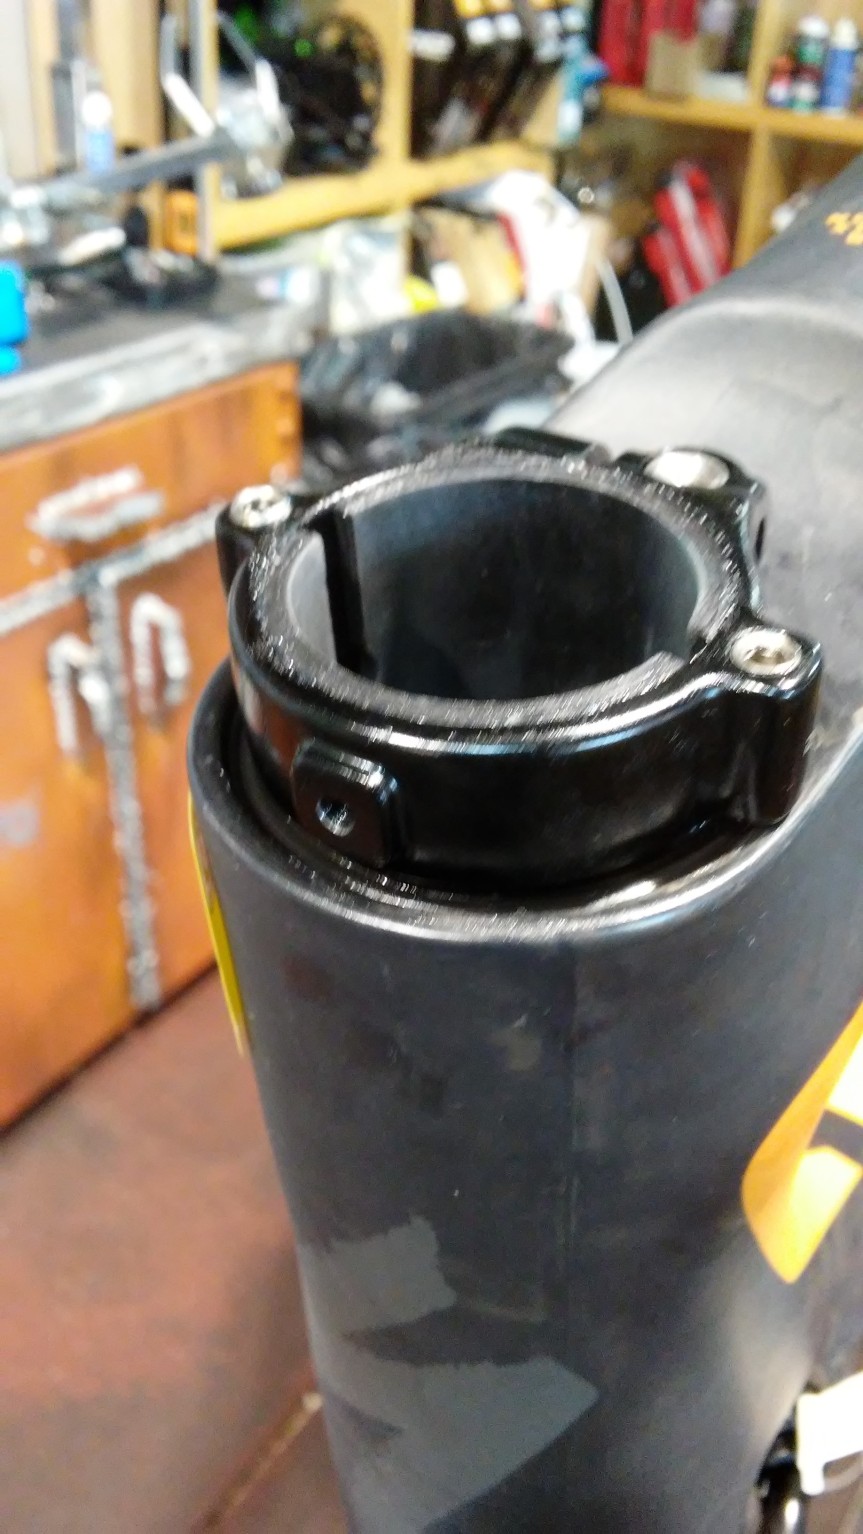
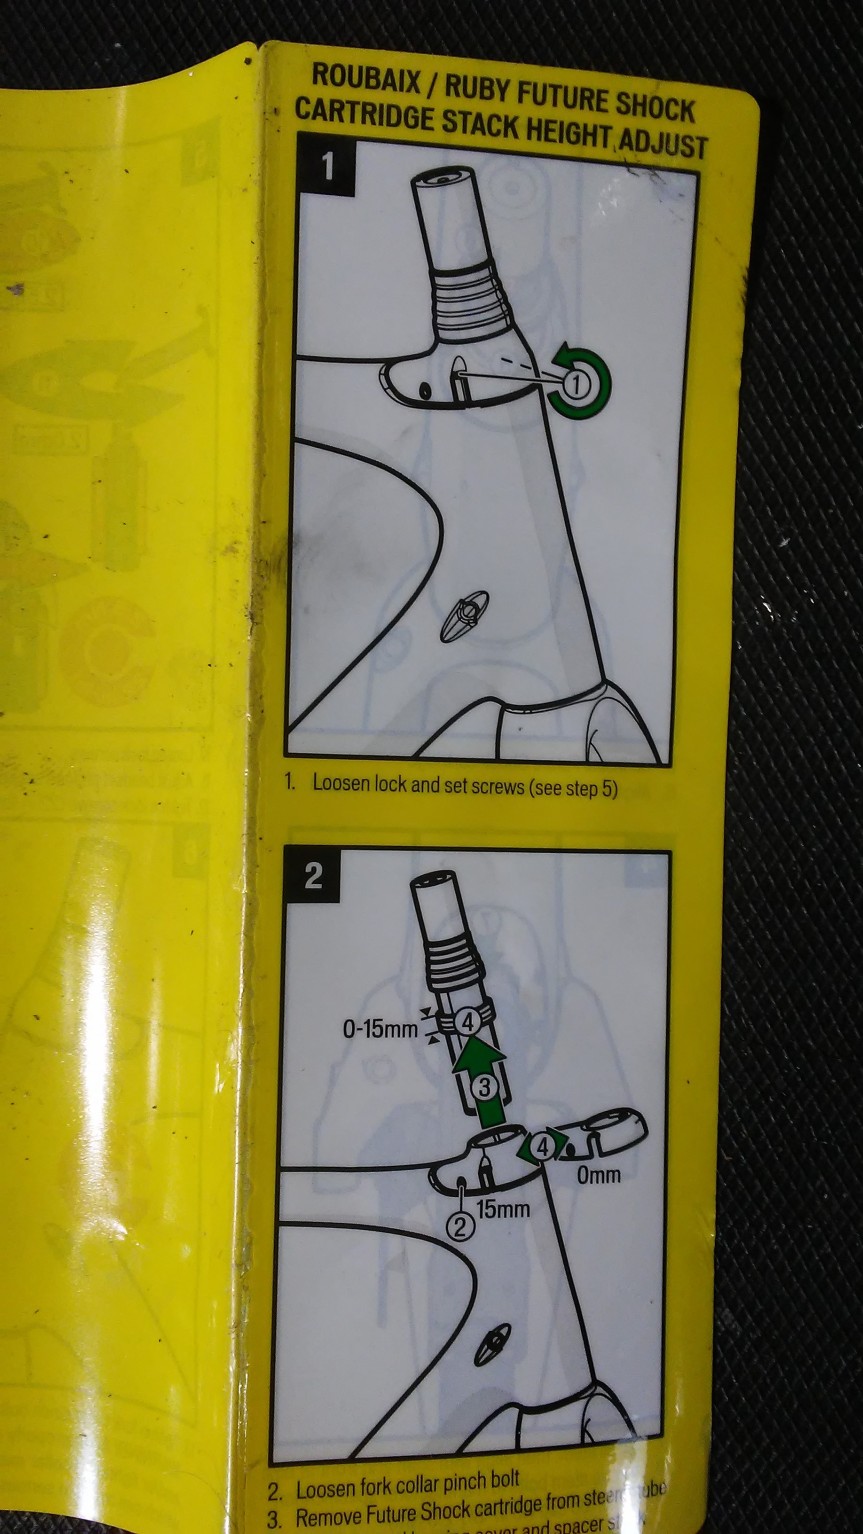
Now, the main thing that I question somewhat is the headset bearings for this bike.  Because of the Future Shock cartridge sits in a reinforced carbon steerer tube that is not 1-1/8″ or tapered, it requires special headset bearings.  I checked with pretty much all of our distributors and none of them have this bearing (not even close).  Thus, I hope Specialized has a great backstock of these and as a shop, you should definitely have some ready to go yourselves.  Other than that, I can see this technology making its way to other models and staying a features of the gravel grinder and cross category.  Here are some photos of the headset assembly.  Enjoy!

20161019_11132920161019_11141620161019_11145820161019_11205920161019_11213620161019_11275920161019_112809

Dura-Ace 9100 Preview


Hey everyone!  I wanted to share a few photos and thoughts after seeing and riding the new Shimano Dura-Ace groupset.  It features some really nice improvements and has some new tech that stays in line with the prior model.

The lever throw is significantly and noticeably less that 9000 and has a slightly crisper feeling to the shift.  It reminded me of old school 9 speed Dura-Ace and how the lever actuation felt like there was a beginning and end to the throw for each shift.  The hoods are redesigned as a single compound hood with some grip pattern in the right places.  While it resembled the more ergo feel of Campagnolo, it had its own unique feel overall and was pleasant to hold on to.

The front derailleur is by far the most innovative piece of the system (other than the power integration with the cranksets, which I haven’t seen yet).  It uses a separate spring tension to actuate the derailleur that is separately adjusted from the cable tension.  It is kind of like having a built in inline barrel adjuster at the actual component rather than in the housing routing.  It gets rid of the tall arm that was getting in the way of some gravel grinder frames in the 9000 series because it would rub the fatter tires (thus, most were coming spec’d with 10 speed front derailleurs).

The brakes are slightly more responsive and use a nicely redesigned cam action to open and close the brake for narrow or wide rims.  It moves opposite to the prior models.  The dial goes inward towards the brake rather than opening to the outside.

The crank looked slightly more molded and shaped to accommodate strong pedal forces in the downstroke while giving it a nice blacked out finish that might appeal some more than others.

Lastly, the rear derailleur seems to take a lot of its tech from the XTR derailleur.  It now sports a shadow plus style mounting system, but doesn’t include the clutch (likely for weight savings0.  A full carbon parallelogram holds the pulleys, which are different in size and closely resemble the slightly larger pulley on 11 speed 105 derailleurs.

Anyways, on to the photos, shown below.  I’ll be adding a build review and other tech as we begin to install it in the shop in the weeks to come.  Enjoy!  Stop by and check it out!  I’ll also being adding a few more detailed photos below in the next couple days as I have a chance to take it apart.


Edit20161011_13071020161011_13073120161011_13073820161011_13074620161011_131756

New Group in Action!

Hey everyone!  My shop’s owner is currently test riding a new group on some beautiful Pinarello frames in Italy and sent me a few sneak peak photos of a new group coming out shortly.  From the looks of it, you can likely guess who is making it and it has been previewed before, but this provides a nice clear set of photos (logos blurred) of the components.  More to come in this article on how it works and how it performs! Happy Tuesday!

Uno 1Uno 2Uno 3Uno 4Uno 5

First Thoughts and Review of the Specialized Turbo Levo Ebike

Hello everyone!  I have some exciting information and photos to share with you on the new Specialized Turbo Levo mountain bike.  One of our guys got to fly out to Moab this past weekend for some press release testing and rides and gave me the low down on many of the specs and what to expect from this new kind of bike.  V__24E7

First off, the Levo gets much of the DNA that exists in the Specialized Stumpjumper.  The bottom bracket is a bit higher though as well as shorter crank arms and chainstays to avoid striking rocks.  It has the shortest chainstays in its class.  It comes stock as a 6fattie wheel setup and can also be converted to a 29er.  The 29er, however, only gains a slight 6 watt gain over the 6fattie.  My thoughts would be that the bike will be most stable with the larger tire.  It also has a low center of gravity to help keep it stable. The rear shock has been specifically tuned to for the additional weight of the bike.

The Levo comes in three configurations.  The SWORKS weighs in at 42lbs and will cost about $10,000, the Expert level weighs in at 44lV__5B4Abs and will cost about $6-7,000, and the Comp level weighs in at 47lbs and costs about $3,500.  The SWORKS and Expert level Levos are equipped with a 504 Wh battery and the Comp comes with a 400 Wh battery.  Both are Lithium ion batteries that use the same cells that exist in the Tesla.  A Tesla has 8000 cells, where a Levo has 40 cells and the Turbo S has 60.  So, that’s a pleasant feature because cheaper cells usually do not react well from vibration (much less from jumps and drops).  The battery weighs 9lbs.

The motor is integrated into the bottom of the downtube and has a 250 watt nominal power with a peak of 530 watts and a torque of 90Nm.  It is definitely the smoothest on the market and extremely quiet with a Gates belt drive.  In order for the motor to engage and apply power, torque must be sensed on the pedals and the rear wheel must have rotation.  The power meter to sense the torque in hidden inside behind the rear rotor.  This is great because if there is no movement, but you are pressing on the pedals, the bike won’t engage and lurch forward.  it will only apply the power once you are moving and pedaling.  This makes a lot of sense because you don’t really need the motor part when going down hill for the most part.V__71EC

Both the motor and the battery are Bluetooth and ANT+ compliant, which removes the need for an LCD screen.  Diagnosis, battery level, and other features of the state of the bike are communicated to either your phone (via the Mission Control app) or through the Garmin Edge 1000 or 520.  The harness for the battery is magnetic and (once the bike is off) can be easily removed and charged on or off the bike.  The motor is also removable and can be diagnosed through the app.

As far as the ride quality, it is top-notch.  A 3-5 hour ride is easily feasible for a single charge, which is mostly due to the mid motor setup versus the hub motor.  The field test rides done in Moab were almost 50 miles together with about 5,000 feet of climbing.  The turbo mode is almost too much power and can cause skidding, but is fantastic to be able to ride to the trails and back.  Most of the effective riding was best done at the Eco mode with a little Trail (more robust) mode here and there.

Climbing is exceptionally great (it was able to clear two foot ledges with ease uphill).  The bike audibly tells you to change gears if the motor is working too hard.  A higher pitched whine from the motor occurs if you are in too low of a gear and a deeper low rumble if you are in too high of a gear.  Like most full-suspension mountain bikes, it is best to be seated while climbing .  Because of the extra power, 3 mile ascents are much easier to handle without issue than with a standard mountain bike.  For descending, it handles great and the extra weight keeps you close to the ground.V__8F0FV__1281

So, additionally, Specialized has gotten together with Strava to create a new ebike category on segments, which will have their own KOMs and leaderboards compared to regular mountain bikes.  In summary, I think this is going to be an awesome bike to let people have a great mountain bike ride even if they are not exceptionally experienced.  It is spec’d really well and I have followed social media of people testing them in Europe for a while, so I would expect that most of the bugs have already been worked out.  More to come when we get one in the shop to build.  I’ll post a good article of the build and closeups of all of the features it has to offer.

SRAM / Zipp Hub and quick release lever recall!!

Hey everyone, we were talking with Zipp this morning about a repair and found out that there is a newly released recall of most of their front hubs (88v6, 88v7, and 88v8) because of a possibly failing at the retaining ring that holds the spokes in the hub.  The description reads: “This recall includes SRAM’s Zipp bicycle wheel hubs. The model names of the affected hubs are ZIPP 88v6, 88v7 and 88v8. The Z logo is printed on the hub. The wheel hubs come in black, silver and falcon grey. The diameter of the clinch nut is approximately 1.46 inches. Some of the hubs were sold as part of wheel sets installed on new bicycles. SRAM will post a list of affected bicycle brands and models on its website at www.sram.com.”

The link for this recall is here

Also, several minutes after seeing it posted on the CSPC site, they posted another recall for their quick release skewers. Only quick releases without a marking at the center of the underside of the lever are included in this recall.  The description reads: “This recalls involves SRAM’s Zipp stainless steel or titanium quick releases. They were sold as aftermarket components or as part of the 202 DB V2, 303 DB V2, 404 Firestrike V2, 202 Firecrest V3, 303 Firecrest V3, 404 Firecrest V3, 808 Firecrest V3 or 808 NSW wheels. The quick release has a curved, black lever. Zipp appears on the lever. Only quick releases without a marking at the center of the underside of the lever, below the Zipp logo are included on this recall.

The link for this recall is here


Feel free to drop by the shop with your wheels so they can be processed as soon as possible with the season starting up!


SRAM eTap Actual Weights

About a week ago, we finally got all of our SRAM eTap groupsets in the shop.  We got six full groups out of the first batch of twelve to hit the US.  They come with the wireless components (derailleurs and shifters), a Quarq power meter crank, and SRAM Red brakes, cassette, and chain.  Out of the groupsets, two were TT eTap groups, which have the wireless ‘blips’ that actuate the derailleur like the paddle on the shifter.  I will be posting a good installation article that goes more in depth than the initial article I wrote on eTap.  In the mean time, I thought it would be cool to have some photos of the components and their actual weight.  Pretty light stuff and I really think it will be a popular option.

WP_20160206_11_49_48_Pro
SRAM eTap Rear Derailleur
WP_20160206_11_50_38_Pro
Interchangeable battery for SRAM eTap
WP_20160206_11_50_39_Pro
Interchangeable battery for SRAM eTap
WP_20160206_11_50_51_Pro
SRAM eTap Front Derailleur
WP_20160206_11_51_20_Pro
Left SRAM eTap Shifter
WP_20160206_11_51_27_Pro
Both SRAM eTap Shifters

265 grams (Shifters), 160 grams (Front Derailleur), 238 grams (Rear Derailleur) = 663 grams.

So, after seeing the weights, I obviously wanted to see what the comparison was with Shimano Dura-Ace Di2 9070.  Here it is

230 grams (Shifters), 107 grams (Front Derailleur), 214 grams (Rear Derailleur), 50 grams (Battery) = 601 grams.  I am pretty sure that while the wires do weigh something, it’s not hardly enough to make it heavier than the eTap (maybe if you use 1000mm wires for all of the bike, haha).  So, while eTap is slightly heavier, it is not by much.  If you look at cassette, brakes, and cranksets (not a Quarq), chain, and bottom bracket, it is still lighter than Dura-Ace by almost a hundred grams.  This savings is almost entirely in the crank and cassette weights.  Anyways, hope this shed s a bit more light on the newest groupset.  I am also anxiously awaiting more photo leaks of the new Dura-Ace 9100, which looks to be wired, but will have an A Junction that can be updated and adjusted wirelessly.  That is a way more efficient way of easily checking firmware and diagnosing issues.


DTworks Venge Custom Vinyl Project

Hello everyone!  Happy 2016!  To start into the new year, I would like to showcase a project I helped out with and something that I am implementing into a business with local clients and soon, over the Internet.  A couple months ago, I purchased a vinyl cutter from Silhouette.  It can be used for a variety of things from decals, wraps, custom graphics on clothing, stencils for paint, templates, and sketching.  The model is a Cameo V2, which is an improved design and machine over its predecessor.  My initial goals were to practice with random requests and ideas and get an efficient workflow going with a quick turnaround.  Onto the first real project!

A local restaurant I love in Arlington, VA is called District Taco that started off as a food truck and now has locations all around the area.  The owner is an avid cyclist and has two teams at different competitive levels and loves to sport fresh custom cycling kits and awesome bikes.  He came to a mutual friend of ours asking to custom paint a Specialized Venge in a District Taco theme.  After telling me about the frame, I offered to make the decals to represent the team and give it that extra panache.  He liked the idea and I started up some designs in Photoshop, making a couple revisions to get the final product.  He had a great idea of having the Sworks on the bike, but as DTworks.  After the decals were applied, the frame was clear coated for protection and came out well.  Here it is!

WP_20151218_14_28_25_Pro12362793_10205265422460397_3165012697204072468_o

The paint really was an exceptional finish and good thought went into the accents.  It was outfitted with Enve wheels and cockpit and Dura-Ace Di2 and an SRM.  I didn’t have the pleasure of building it, but it looked very pro.

So, I am open now to all types of new vinyl projects in addition to decals and now completely custom nameplates.  Your team logo with your name or a quote or image — anything is possible.  I am also looking forward to working with businesses in the area for window vinyl decals and panels.  Feel free to connect with me through my Facebook page or by email.  I hope you enjoyed checking out the bike and look forward to expanding these types of projects.  Happy New Year!