First Thoughts and Review of the Specialized Turbo Levo Ebike

Hello everyone!  I have some exciting information and photos to share with you on the new Specialized Turbo Levo mountain bike.  One of our guys got to fly out to Moab this past weekend for some press release testing and rides and gave me the low down on many of the specs and what to expect from this new kind of bike.  V__24E7

First off, the Levo gets much of the DNA that exists in the Specialized Stumpjumper.  The bottom bracket is a bit higher though as well as shorter crank arms and chainstays to avoid striking rocks.  It has the shortest chainstays in its class.  It comes stock as a 6fattie wheel setup and can also be converted to a 29er.  The 29er, however, only gains a slight 6 watt gain over the 6fattie.  My thoughts would be that the bike will be most stable with the larger tire.  It also has a low center of gravity to help keep it stable. The rear shock has been specifically tuned to for the additional weight of the bike.

The Levo comes in three configurations.  The SWORKS weighs in at 42lbs and will cost about $10,000, the Expert level weighs in at 44lV__5B4Abs and will cost about $6-7,000, and the Comp level weighs in at 47lbs and costs about $3,500.  The SWORKS and Expert level Levos are equipped with a 504 Wh battery and the Comp comes with a 400 Wh battery.  Both are Lithium ion batteries that use the same cells that exist in the Tesla.  A Tesla has 8000 cells, where a Levo has 40 cells and the Turbo S has 60.  So, that’s a pleasant feature because cheaper cells usually do not react well from vibration (much less from jumps and drops).  The battery weighs 9lbs.

The motor is integrated into the bottom of the downtube and has a 250 watt nominal power with a peak of 530 watts and a torque of 90Nm.  It is definitely the smoothest on the market and extremely quiet with a Gates belt drive.  In order for the motor to engage and apply power, torque must be sensed on the pedals and the rear wheel must have rotation.  The power meter to sense the torque in hidden inside behind the rear rotor.  This is great because if there is no movement, but you are pressing on the pedals, the bike won’t engage and lurch forward.  it will only apply the power once you are moving and pedaling.  This makes a lot of sense because you don’t really need the motor part when going down hill for the most part.V__71EC

Both the motor and the battery are Bluetooth and ANT+ compliant, which removes the need for an LCD screen.  Diagnosis, battery level, and other features of the state of the bike are communicated to either your phone (via the Mission Control app) or through the Garmin Edge 1000 or 520.  The harness for the battery is magnetic and (once the bike is off) can be easily removed and charged on or off the bike.  The motor is also removable and can be diagnosed through the app.

As far as the ride quality, it is top-notch.  A 3-5 hour ride is easily feasible for a single charge, which is mostly due to the mid motor setup versus the hub motor.  The field test rides done in Moab were almost 50 miles together with about 5,000 feet of climbing.  The turbo mode is almost too much power and can cause skidding, but is fantastic to be able to ride to the trails and back.  Most of the effective riding was best done at the Eco mode with a little Trail (more robust) mode here and there.

Climbing is exceptionally great (it was able to clear two foot ledges with ease uphill).  The bike audibly tells you to change gears if the motor is working too hard.  A higher pitched whine from the motor occurs if you are in too low of a gear and a deeper low rumble if you are in too high of a gear.  Like most full-suspension mountain bikes, it is best to be seated while climbing .  Because of the extra power, 3 mile ascents are much easier to handle without issue than with a standard mountain bike.  For descending, it handles great and the extra weight keeps you close to the ground.V__8F0FV__1281

So, additionally, Specialized has gotten together with Strava to create a new ebike category on segments, which will have their own KOMs and leaderboards compared to regular mountain bikes.  In summary, I think this is going to be an awesome bike to let people have a great mountain bike ride even if they are not exceptionally experienced.  It is spec’d really well and I have followed social media of people testing them in Europe for a while, so I would expect that most of the bugs have already been worked out.  More to come when we get one in the shop to build.  I’ll post a good article of the build and closeups of all of the features it has to offer.

SRAM eTap – It’s etapular!

Hello everyone!  I was able to cover and help with our first SRAM eTap build in the shop for our SRAM rep and I will tell you it is a force to be reckoned with.  They have really thought out the design completely and it works very well.  Plus, having only the brake cables running from the bars to the frame is looking so clean and fresh.  Swappable identical batteries are a big plus if you run out of juice (approximate life is 1000km or so).

The build itself is ridiculously easy and the Parlee frameset was made for eTap (no frame fittings except the rear brake).  With only an internal brake cable to route, it saves a lot of time.  Pop on the front and rear derailleurs.  Pop on the shifters. Sync up the system in about a minute or less and you have a working electronic drivetrain.  Pretty awesome.  In addition, it is great to see a derailleur off the bike on the counter fifteen feet away and actuate it while a customer is checking out.  They’ll think it’s possessed!

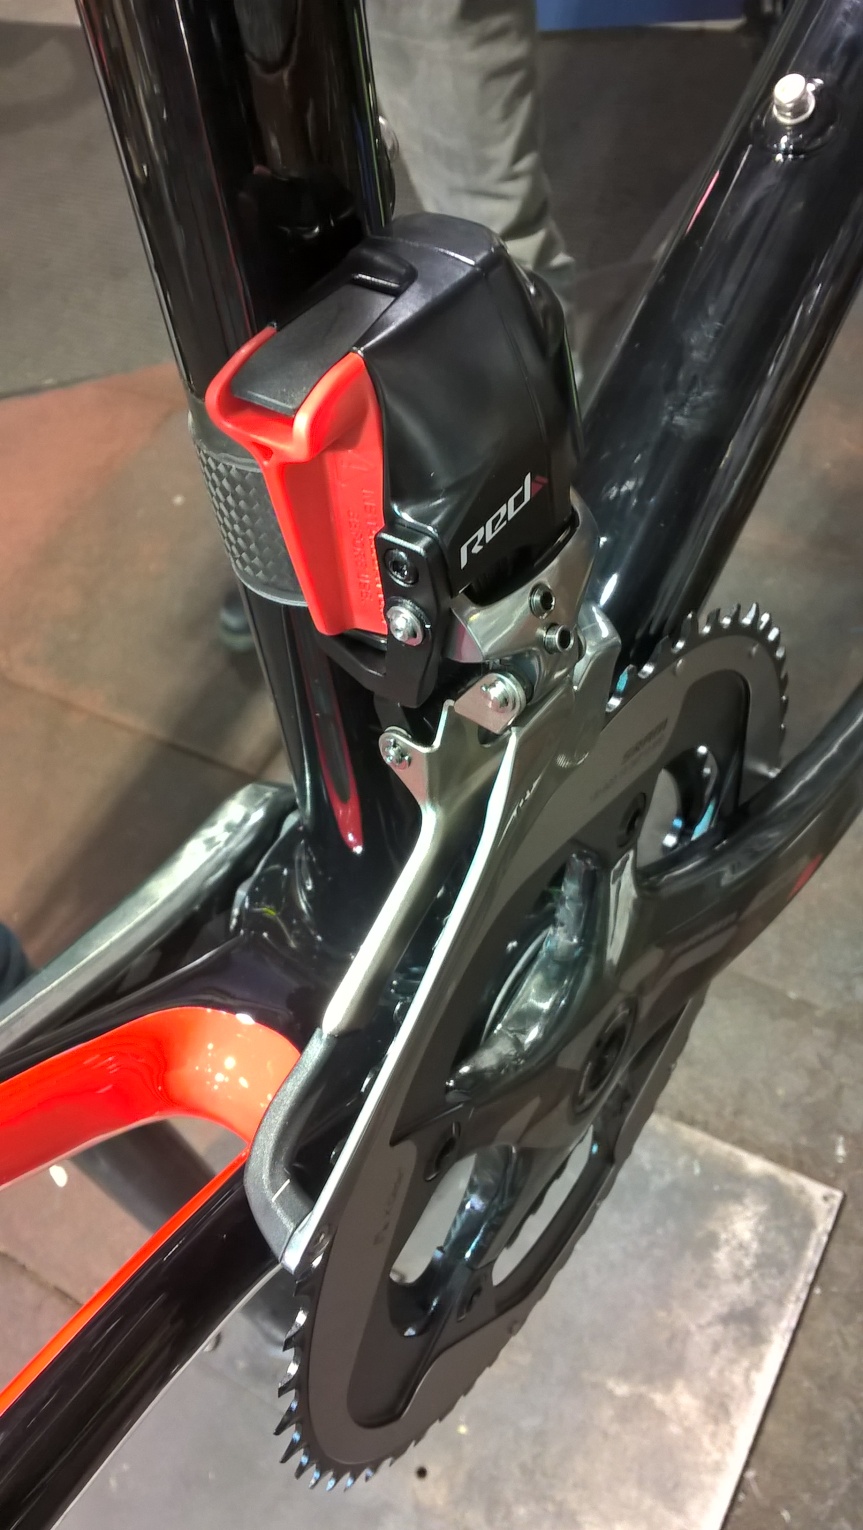
Here are some photos of the build (what little there is) and then a couple videos of the derailleurs in action.  To shift the bike the left paddle controls shifting the rear to a higher gear and the right paddle controls shifting to a lower gear in the rear.  Pressing both paddles shifts the front up or down depending if you are on the large chainring or small.  Charging the bike takes only about 40 minutes.

Actually, the videos are more interesting than the photos.  Here they are, photos below that.


The above three videos are of the derailleurs actuating wirelessly from the the shifters.  Pretty awesome and syncs easily.  Press the small button on the rear derailleur to start sync.  The LED below the button will start flashing.  Proceed to press the same button on the front derailleur and it will also flash.  Last, sync each shifter by pressing the same little black button on the inside of the shifter paddle.


WP_20151124_17_25_29_Pro
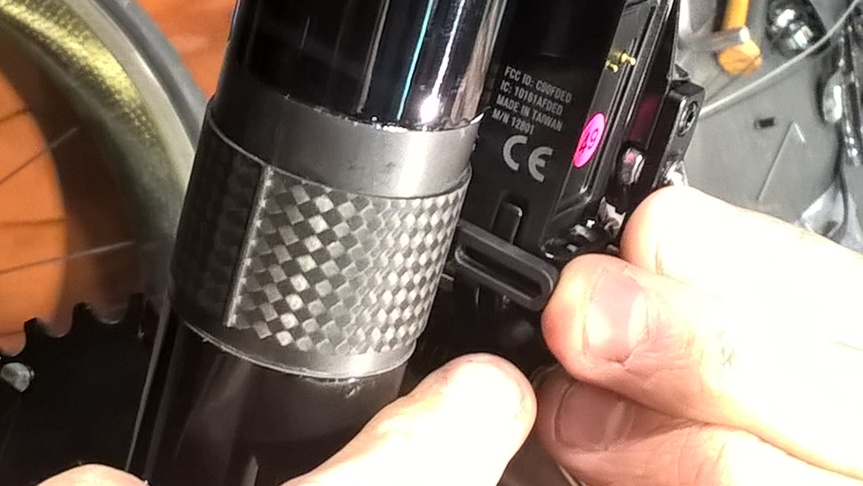
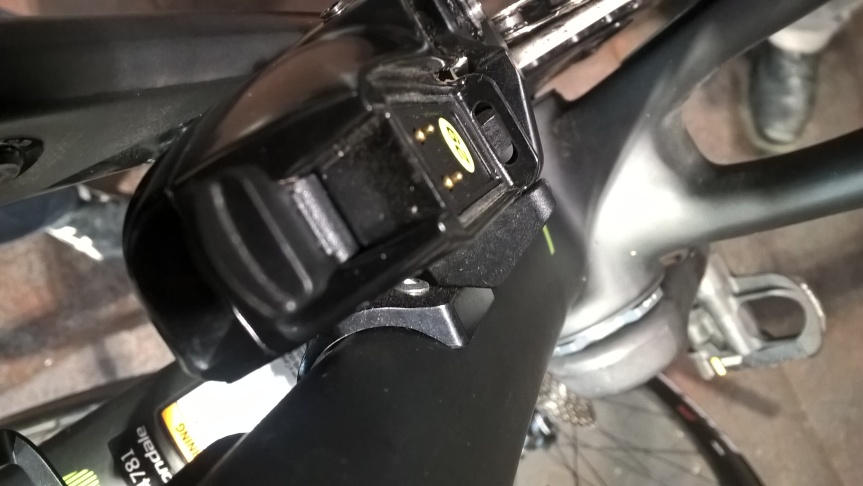
SRAM eTap rear derailleur without battery
WP_20151124_17_25_43_Pro
SRAM eTap rear derailleur with battery placeholder
WP_20151124_17_25_55_Pro
Front view of the SRAM eTap rear derailleur.  Note the little black button sticking out right at the bottom for syncing the components.
WP_20151124_17_41_50_Pro
SRAM eTap front derailleur with battery placeholder
WP_20151124_17_42_01_Pro
Limit adjustment screws on the front derailleur
WP_20151124_17_42_18_Pro
Rear view of the SRAM eTap front derailleur
WP_20151124_17_43_46_Pro
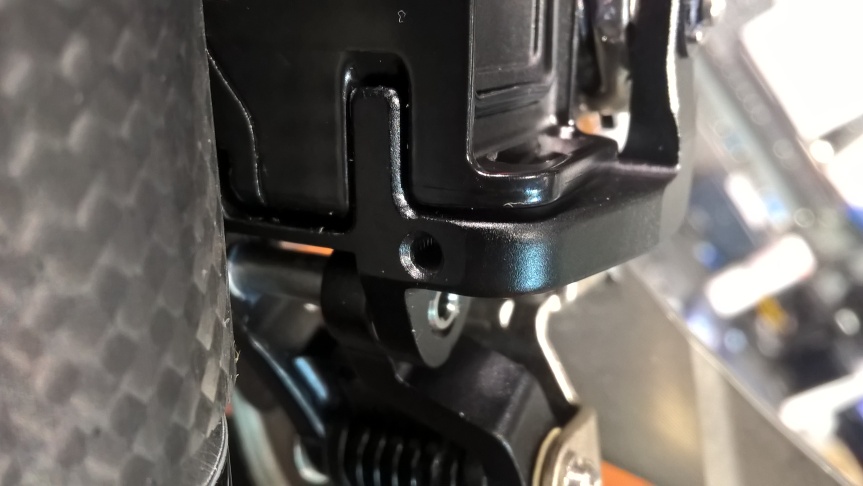
SRAM eTap front derailleurs use a support wedge to stiffen the actuation of the component. Contrasted to Shimano’s support screw in design, but both are easy to install with a set screw anchoring the wedge based on the angle of the cage.
WP_20151124_17_44_16_Pro
Wedge screw anchor threads.
WP_20151124_17_44_56_Pro
Top view of the SRAM eTap support wedge.

WP_20151124_17_45_06_Pro

WP_20151124_17_53_57_Pro
Most of the brains for the system are housed in the rear derailleur.

I hope you’ve gotten a good first insight into the new SRAM eTap system.  More will follow as we work with it more and any hacks will of course be shared.  Thanks for reading and checking out the videos and photos!


Building the Specialized Venge Vias

Here are some more photos of building up the bike this morning and then some photos of afterward.  There were many good concepts behind the hidden cable design and mounts as well as possibilities for having Junction A externally mounted beneath the adjustable Garmin mount on the front of the handlebars.  Some of the setup for the front brake is difficult and I have to trim the cable several times and re-sleeve it before it actuated correctly and smoothly.  The routing over the the steerer tube of the brake hoses and Di2 wire was well thought out and (while tight) came together great.  The addition of the carbon waterbottle cage (included) with the SWAT tool and mounting bracket below the cage was a nice touch.  We immediately went for Supakaz Black Kush tape instead of the stock white and also replaced the white Power saddle with a black one to stealth it out.  All in all, it built nicely and looked good in the final photos.  Final weight with the cage and SWAT (no pedals) as stock build for a 56cm was 17.57 lbs.  I am just going to display all the photos below right after each other so you can see the details.  Message or comment with any questions!

SpecializedVengeVias001 SpecializedVengeVias002 SpecializedVengeVias003 SpecializedVengeVias004 SpecializedVengeVias005 SpecializedVengeVias006 SpecializedVengeVias007 SpecializedVengeVias008 SpecializedVengeVias009 SpecializedVengeVias010 SpecializedVengeVias011 SpecializedVengeVias012 SpecializedVengeVias013 SpecializedVengeVias014 SpecializedVengeVias015 SpecializedVengeVias016 SpecializedVengeVias017 SpecializedVengeVias018 SpecializedVengeVias019 SpecializedVengeVias020 SpecializedVengeVias021 SpecializedVengeVias022 SpecializedVengeVias023 SpecializedVengeVias024 SpecializedVengeVias025 SpecializedVengeVias026 SpecializedVengeVias027 SpecializedVengeVias028 SpecializedVengeVias029 SpecializedVengeVias030 SpecializedVengeVias031 SpecializedVengeVias032 SpecializedVengeVias033 SpecializedVengeVias034 SpecializedVengeVias035 SpecializedVengeVias036 SpecializedVengeVias037 SpecializedVengeVias038

Santa Cruz Bronson C Probuild and Preview of XTR M9000

The past two days both held some great knowledge and experience with the mountain bike industry at the shop.  First, a nice progress slideshow of a Santa Cruz build I was nearly able to finish except for final tuning due to the need for new axle end caps for a rear DT Swiss hub on a thru axle Bronson C equipped with 10 speed Shimano XT Dynasys.  It came together especially well with a Fox Float 36 with 180mm of travel.  Other specs included a Cane Creek 40 headset, a tubeless Schwalbe Nobby Nic setup, a Thomson Masterpiece seatpost and Elite X4 stem, a Selle Italia mountain saddle, and Enve bars.  Strong pretty much in all accounts for sweet jump style riding anywhere in this area.  With included block spacers, the fork travel can be lowered down to the rider desired 150mm.  Here it is nearly finished without grips and rear axle end caps.

The new XTR groupset showed up today on a Rocky Mountain frame and we got to spin through it and discuss with the rep the different features and possibilities with the mechanical version as well as the Di2 version coming soon.  The expectations of riders from preview videos and info expos is well met.  For mountain biking, I am very sure Shimano has a groupset for every rider from 3×11 to 1×11 in both mechanical and electronic.  It’s a design update that really will help change the game and bring new levels of performance to the industry.  Here are a few photos of the drivetrain.

This slideshow requires JavaScript.

Last but not least, I have discovered some good new information regarding troubleshooting the Stromer electric bike and will update the article and also provide the link here in the next few days.  It streamlines the troubleshooting to either the components or the wires and clarifies a few earlier questions.

– SNC

2015 Turbo and Turbo X Preview / First Thoughts

The 2015 Turbos have arrived! I was psyched on Friday to see the truck roll up with four brand new Turbos and 1 new Turbo X (with a  suspension fork and knobbier tires).  We had been expecting them and I started the builds right away.  I documented the process of unpacking and setting up the bike and the pros and cons of that and exploration of the features as a quick first look.  I am sure we will be seeing them find homes shortly and will continually add summary progress in a troubleshooting article that will build with time.

They were the middle range motor/battery option which seemed to top out at around 21 mph with moderate effort.  Both models feature some great new tech options and builds upon prior years’ success.  They substituted their own branded stem on both models this year instead of the Crank Brothers model from prior years.  The key and battery lock look like a different make and the disc brakes are Formula C1 models.  Much of the rest of the bike is the same.  The Turbo X front light mounts on the handlebar, which I prefer over the Turbo mount at the crown of the fork.  The Rock Shox Paragon 50mm (regular QR) air fork with remote cable lockout is a nice touch on the Turbo X. It is also spec’d with Trigger tires, which I believe might be better suited to substitute Electrak tires.  The first nine photos are of the Turbo X and the rest are of the Turbo and its accessories.  The LCD controller looks the same and mounts in conjunction with the shifter and brake lever.

What I didn’t know about electric bikes

After a lot of research this weekend, I learned quite a bit more about electric bikes and how they work.  I particularly concentrated on how the motor in the rear hub operates and how it can provide power without any moving parts.  My first goal from this point will be to open the hub shell of an Ultra Motor brand hub motor in the rear wheel of a Stromer.  I’ll detail all of it in a well-covered post.

Most of the information I found was on just a couple websites which I somehow had not come across yet. Electric Bike is definitely well organized and provided the most information about a variety of hub motors and their corresponding controllers and diagnostic procedures.  Ypedal has an amazing and vast knowledge of the systems and has created tons of custom setups as well as details repair on several Youtube videos that is a complete procedure and well explained.

Most of the motors have a similar layout:  An outer shell to protect and encase the motor, then a ring of magnets that are positioned between the shell and coils of copper wire.  Other than a couple sensors and wires that exit through the center of the wheel near the axle, that’s about it.  Very simple and once familiar with the parts, moderately easy to work on.  I chose to first learn about the motor because it seems like this is the only component that I haven’t been able to service other than to simply install a replacement wheel.  To have the ability to fix the motors once the manufacturer’s warranty expires will be essential — especially as the number of electric bikes is increasing and they are becoming more common.

Back to the sensors and wires in the motor.  Usually there are three small square shaped sensors that are positioned between two of the outer magnets in line with each other.  These are called Hall sensors and they measure the electrical current coming out of the motor as the wheel spins.  A tapered side of the sensor body is always positioned outward and usually is set with a tiny amount of JB Weld or epoxy. Out of the top of each sensor are three uncovered wire leads that are soldered to colored wires carefully running to the center of the hub and exit from the wheel to the controller and potentially a torque sensor.  A torque sensor is generally on higher end electric bikes while cheaper versions simply use a cadence magnet to calculate the input of added power.  The torque sensor is nicer because it adds power based on a direct measurement of the deflection of the wheel backward against the rear dropout when you put pressure on the chain and pedals.  Most are robust and work accurately, giving the rider a better feel of added power when accelerating.

In some situations, I read that one or more of the Hall sensors can go bad and with the right tools, it is a small project for an afternoon that will avoid a replacement ($500-750) or service elsewhere ($100/hr).  Even if you aren’t up to doing the task yourself, you will be better able to diagnose and familiarize issues that occur.  For the avid mechanic, it is possible to upgrade your hub motor for minimal cost.  Larger wires (if they can fit through the frame and center of the wheel) will boost available power and a better controller or throttle can more accurately distribute the power.  Unless you have an extreme desire to mod your electric bike, the magnets and copper wire are difficult and costly to replace.  Some motors are spun low with larger gauge copper wire which can provide more power, but less torque on hilly terrain while high spin copper will have better power at a high cadence and will last longer.

In order to remove the motor from its hub shell, a car bearing puller is necessary.  It is an extractor style tool with three arms that pull on the shell while a center bolt pushes the axle and opposite hub shell side.  It is helpful and recommended that you tap the shell with a mallet during this process to aid in freeing the two halves.  Otherwise, direct extraction with the bearing puller could break the hub flange and then you’ll be left with a useless motor and no shell.

Considering the Stromer that was detailed in the review and diagnosis, I believe that the torque sensor was overloaded in the frame without that necessary bolt and the motor overheated and fried one or more of the sensors.  This would explain the NO_COMM lack of communication between the LCD controller and the motor.

It makes a lot of sense once the elements are broken down like that.  I also think that one of the wires exiting the rear hub is a faulty wire with a weak spot somewhere near the center of the wheel.  The torque sensor itself seems okay.  I am going to check current through each of the wires to determine the faulty one and then solder in a new one along with the replacement of the sensors.

I was very happy to find this information and come to realization that these bikes can be fixed from the ground up if necessary.  Why wait a week or weeks for new parts to install when the local hardware store and Radio Shack have all the necessary parts for a solution?  I am going to continue to do more research into the motor repairs as well as connecting different controllers to the bike for operation.  It is exciting to realize that with the right research, I can create incredibly fun bikes that are useful for both fun and transportation. Now, once I can locate a car bearing puller, I’ll open the motor and take photos of everything so you can see it.  Stay tuned!

– SNC

2015 Campagnolo Record Preview

I got an excellent opportunity this morning to join my fellow mechanics and gaze at the new 2015 Campagnolo Record group brought by the US rep to explain new features and designs.  It really packed a punch aesthetically and is sure to be a powerhouse to compete with the other major drivetrains out there.  That being said — onto the good stuff!

The first component we looked at are the new shift/brake levers and how they differ from previous generations.  The hoods and body of the brifter are the same shape as the prior edition, but have small improvements.  The hood has a different pattern that contours the brifter better and helps to eliminate the ‘crease’ that some worn in hoods experience after heavy use.  This is also reflected on the inside of the hood where they created a thicker mesh under pressure points for better vibration dampening and a more secure fit.  A small print of “Campagnolo” is displayed in white at the outer front side of the hood.  Here are a couple photos:

The internals look basically the same with the exception of a different ratcheting shift mechanism that corresponds to the way the rear derailleur will travel up and down the cogs (actuation ratio).  This does mean that it is incompatible with the prior generation.

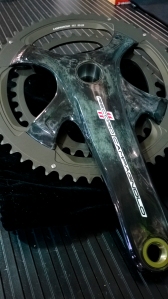
The crank was totally redesigned with the newer four arm spider made of carbon fiber and the chainrings each using 4 chainring bolts to attach to the arms.  This, along with the profiling of the top of each arm over the outer chainring is expected to confidently support the near 45Nm torque of the front derailleur shifting from the inner to the outer ring.  Also, I should note that the downshift is slightly different and acts much more like its electronic cousin, EPS.  When dropping from the outer ring the inner ring, the derailleur will drop to a low trim position — one slight click up from its innermost position.  This should help greatly in eliminating a chain dropping.  Here is a photo:

2015 Campagnolo Record 11 Crankset

Next was the front derailleur which ties into the prior paragraph about the 45Nm torque of the shift.  This is an improvement of about 10Nm more than the last generation and only 7Nm less than its EPS counterpart.  A 3D molded carbon cage exists on the Record and Super Record mechs and is an alloy cage on the Chorus level.  The improvement of the shifting power is mainly due to the added length of the arm used to anchor the cable.  Here’s a couple views:

The rear derailleur was definitely the best part about the entire presentation.  It boasts an incredibly light weight and features carbon fiber all over in both the Record and Super record levels.  The Chorus level will have an alloy outer parallelogram plate.  The reintroduction of a B-tension screw will help to eliminate differences in frame manufacturing specifications and allow the derailleur to be dialed in the exact same way on any number of bikes.  It’s best feature is a spline drive inside the anchor pivot that winds the spring tighter as the derailleur moves up and down the cogs.  Its benefit is to keep the upper pulley moving with the same curved slope of the cogs to prevent missed shifts and smoother transition.  Check it out:

Lastly, here are a few photos of the EPS bike with current generation Super Record 11 EPS:

Update and The Ridge

So, the Turbo wheel was sent back to Specialized for recalibration of the motor. When it came back, it was an entirely new wheel. While the defective motor was replaced, the newly installed one worked perfectly and has since been performing without flaw. It was a pretty quick turn around (about a week).

I’ll be back to posting on both some technical articles and a few on the biking culture in general. With the season slowing down a bit, I now have better time to devote. Also, concerning biking culture and news, I have been in the heart of the situation of cyclists being called terrorists in Washington D.C. and have been listening to many sides of the story as it has resurfaced a couple days ago on the Kojo Nnamdi show on NPR. Both sides have strong opinion and reasons for concern and I think it’s a good time to highlight some of it from a practical standpoint.

Also, the new Danny Macaskill video, “The Ridge” is quite amazing and you should watch it immediately.

Turbo Diagnosis Update

Hey everyone! The Turbo S Diagnosis and Troubleshooting article is almost complete. There has been a slight delay because of a new issue that arose within the past few days that is still in progress of being solved and fixed.

One of the 2014 black Turbo S models came in with a particular issue with the motor engaging once pressure to the pedals occurred in Full Active Mode and Eco (30%) mode. You might think, “Isn’t that what the bike is supposed to do?” Well, yes. However, with this particular one, the motor engaged to the Turbo max speed of 28mph without disengaging when the brake was pulled and acted as a throttle (no pedaling required) rather than an electric assist. This could be compared to the gas pedal on your car sticking on the floor and your car traveling at top speed until you shut it off or change gears (on the Turbo, going to No Assist mode or Regeneration mode would disengage the motor). As a side note, one the Turbo was in Regeneration mode, it was much more difficult to pedal than normal while in this mode and the wheel would take a small 1/8 to 1/4 turn backwards when the pedals stopped turning.

As you may have guessed with continual throttle at 28mph, it totally cooked the rear brake pads and most of the front.

So, I will be problem solving it for a day or two more and running several tests while collaborating with Specialized technicians to diagnosis this and of course, finish up the results in Part 2 of the Turbo Review. Thanks for being patient. I hope this gets you curious about the bike and working on it more. I still think the bike is fantastic and doesn’t normally reflect any or all of these problems. In large, it is the most trouble-free electric assist bike I have worked on out of over twenty different brands. These issues are published to conglomerate the most information possible in order to have the largest audience possible understand how to work on the them and maintain them.

– SNC

What’s in the stand today?

This is what I was working on today….

This slideshow requires JavaScript.

Specs are as follows:

Specialized SWORKS Shiv frameset with integrated aero brakeset, seatpost, and Sitero saddle.  This was a stock build I had etched up a few months back and it had been sitting on our Specialized wall with some grandeur.  It’s spec’d with a Dura-Ace 9000 groupset with time trial shifters.  Zipp Beyond Black stem was swapped for the standard stock stem setup in order to run a Zipp Vuka Bull base bar with TRP carbon brake levers and Fizik matte black tape.  The wheelset currently is a nice set of CXP80 Cosmics, but likely will be switched to Zipp 808s.  It’s a really great aero build that will be the epitome of stealth and craftsmanship.  Since I built it accordingly before, it’s been easy to set in the new cockpit and all that is left is to route the new cables and tune.  Other pressing projects intervened this build today including a Di2 upgrade on a Caad 10 Synapse frameset, a SWORKS lululemon Amira with Ultegra Di2, and an SWORKS hardtail Stumpjumper that needed a final bleed and hose replacement for Formula brakes front and rear.  That was also a great build last week that I should have a finals slideshow for tomorrow evening or Sunday.  Internal hydraulic routing and XX1 group with a nice tubeless setup.  Anyways, I’ve had a long week and got a lot of great projects out to happy riders and need some rest.  I’ll have a short article on some tech stuff that has been important to the industry lately tomorrow.  Thanks for checking things out!

-SNC