CTD forks. EPS Campagnolo. R2R carbon bladed spokes. The FD-TL90 tool from Shimano. Half to one and a half degree slack headset spacing from Cane Creek and FSA. Wheel building and the financial cliff from Calvin Jones in the Park Tool corner. My rendition is here.
It was a major growth since two years ago when I last attended the summit in Philadelphia, PA. Being about fifteen minutes from the headquarters helped the steamed eggs provided by Hyatt both mornings with a side of bacon, fruit, OJ, and coffee. The moment I arrived, it was plain to see the lifeblood of the industry flowing and primed for a fireworks event that perhaps may resonate until the 2014 summit.
A haven of tool and torque, the meeting required some heart to fully dive into the torrential downpour of critical information and advice from masters of their craft to the future keyholders of the industry. I felt an isolation of cycling as a science and sport unlike any other moment in my travels to races, events, and expos. This was a contingency of the passion of cycling.
The first day encompassed some ideology that really hit home and expressed the essentials of quality craftsmanship for small companies dedicated to passion, keeping people riding the edge of advanced cycling, and the importance of using a torque wrench on all things bike-related.
Campagnolo and FSA were at the forefront of rider feedback and experience while Cane Creek pointed its attention to enabling the rider to get the best out of their ride, both personally and socially through The Lounge, a facebook for riders to share their settings for suspension and trail experiences. Think about it. If every rider shared what they experienced on their trails and routes, it could create a wave of feedback that could sustain the industry for a generation. Many people think of bikes as a necessary influence in this area that feeds motivation for exercise and ego and vision. If we can show everyone what engineers and scientists and innovators can transform the industry into with amazing components that can propel people down mountains at fifty MPH, then this was the epicenter that it all had the potential to start from.
After the first day of learning, I discussed the experiences with my buddies from the shop and came to realization that we could talk about it far longer in such acclaimed praise that anyone sensing our fervor for the ride would magnetically be drawn to our excitement and hop on their wheels to grab it for themselves.
The Classes:
Campagnolo
Like a righteous cleansing, Campagnolo was a polished trophy that reveled in future and present glory with the shadow of a past decked in ribbons and flawless ideology. The rep spoke of large vats of supersonic heated oil with chain links that never failed during 65mph+ descents and beautiful Italian women lacing Bora Ultra wheels. Fortunately, I realized at this point that dreams were a reality here and that the EPS tuning shown after such a presentation accurately reflected my experiences installing it earlier this year.
More tomorrow on FSA, Cane Creek, Mavic, Fox and others with photos!
Well, tomorrow is the first day of the 2013 Park Tool Summit. This is a big convention of hungry coffee-loving mechanics and enthusiasts brought together by the biggest bicycle tool company in the US. I attended one in Philadelphia about two years ago and am really looking forward to all of the tech knowledge and hands-on working that some of the major component manufacturers lead and discuss. I am attending the following courses: Campagnolo, Cane Creek, Mavic, FSA, Shimano, and Fox. From top-end wheels to overhauling complex suspension forks, it’s sure to be a blast. I plan on taking many notes and recording the seminars with audio that I’ll post for those interested. Prepare for a lengthy post on all of what I see there and learn.
While I will not be able to attend every class, I intend to gain the knowledge from other mechanics my shop is sending there and pass it on to you. May my attention be focused and my hands adept. Being that I will probably have to share the knowledge ASAP, I may post small bits throughout the convention from my tablet. Stay tuned. There’s a ton of great things happening in the industry this year.
**** This article will have updates over time due to the popularity of viewing (thanks) and some good tips and setup methods that have been refined over time. Updates will be noted with a * at the beginning of the sentence and at the end. Important updates will now be placed at the top.
*I am not a fan of the Ultegra/105 level polymer cables. The individual circlets of polymer coating frayed even with precise installation and over time, clog cable housing (of all types including sheaths in the new Venge VIAS) badly and increase friction horribly. I highly suggest you install the Dura-Ace polymer cables as they perform exponentially better since the polymer strands are a spiral and do not ever seem to clog the housing under proper installation and maintenance.*
*When installing the front derailleur cable, I wrap the extra length around in my hand (before anchoring it) and pull hard while actuating the shift lever to aid the housing in settling in. At this same time, I like to use the dull edge of a 3-way hex wrench against the inside curve of the housing. This creates a nice V oval shaped channel for the cable to run. With the addition of SP41 grease during installation, that cable is the smoothest shift on the market. I would even suggest using the cables and housing on other brand’s systems.*
*The loctite (and somehow grease?, which shouldn’t be used) on the support bolts for both Dura-Ace and Ultegra (and 105) front derailleurs is not nearly enough to support the high force pressure of the front derailleur over any decent length of time. So, take the time and immediately remove this bolt, clean it, and apply blue loctite all over it. It will help to ensure the front derailleur shifts exceptionally well over time.*
*Chainrings matter!!! Shimano rings work best, followed by in order of our shop experience: FSA, SWORKS, Cannondale SI spiders, ROTOR, SRAM (only Yaw rings, the regular ones do not perform well for racing conditions), Praxis, and then whatever other chainrings are out there including oval rings (I think personally – “You just chose the best shifting system on the market and now want to use it with chainrings that travel up and down under the front derailleur by almost 2cm? Sure, that’ll work beautifully.?) Just saying that there are probably other options that save you those watts without destroying a great mechanical design.*
Also, please note that the new 6800 Ultegra and 5800 105 level front derailleurs from Shimano are also setup the same way except the Ultegra and 105 models use a slightly different converter tool and instead of a pivotal washer, the pin position that the cable passes before the anchor bolt can be removed and flipped for the recommended setting from the converter tool.*
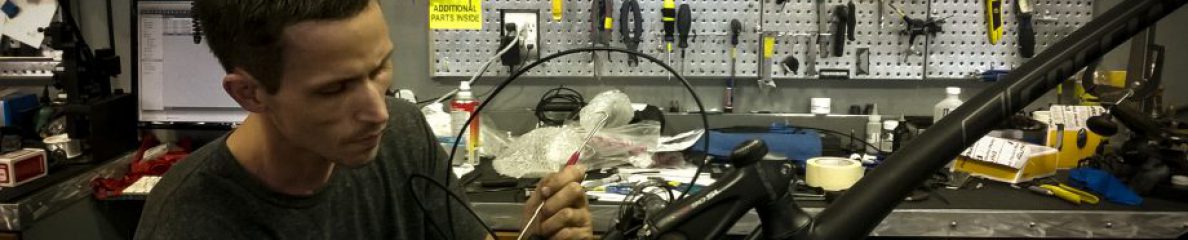
So, I’ve just recently finished learning and training about the new drive-train group from Shimano, Dura-Ace 9000. It is a more complex system than last model (7900) and requires some different tools and setup procedures that I’d like to discuss and bring to light. In particular, the front derailleur is quite different and features extra trim functions (allowing there to be no chain rub) that the Dura-Ace 7900 doesn’t have as well as a great setup tool (TL-FD90) to account for the difference in frame shapes so the derailleur is set up with the same features in all applications. The new front derailleur (FD-9000) sports a longer “arm” to which the cable attaches, providing a smaller swing of the shift lever, which both decreases rider fatigue and produces quicker and more accurate power. Lastly, the feature that surprised me at first is the addition of a frame support bolt for the braze-on FD-9000. It is part of the same design used on the 10-speed Dura-Ace Di2 front derailleur that stiffens the action and equates to a much more “positive” shift. Onto the setup!
Dura-Ace 9000 Front Derailleur
The first thing you’ll want to examine, of course, is which front derailleur will work best on your frame. I recommend always going with the braze-on type and using one of three adapter sizes (34.9mm, 31.8mm, and 31.8mm with a 28.6mm shim). This way, you gain the advantage of having the support bolt as well as the option to use it on a different size frame. Once you’ve selected the correct adapter, attach the derailleur to the adapter using the conical washer and bolt included and torque to the value of 5-7Nm.
Install the adapter onto the frame and lightly tighten the bolt so that you can slide and move the derailleur into position. Line the bottom edge outer plate of the derailleur cage within 1-3mm of the large chainring and position the tail of the derailleur cage 0.5-1mm inward from being lined up with the chainring. This will give you a little room to use the support bolt, which will conveniently and accurately line the cage up parallel to the large chainring.
Using a 2mm allen key, turn the support bolt (located right above the top of the cage) clockwise until it just touches the frame. *Always remove this support bolt and apply blue loctite. The support bolts have been found to move over time when settling in and as the derailleur ages. The loctite already on the bolt is not sufficient to keep the bolt in place.* Then, you’ll remove the derailleur in order to adhere the little metal plate that comes with the component. It comes with two plates. One is curved and one is flat. Use whichever seems to fit better to the frame and make sure the adhesive part is not positioned behind the support bolt. Using isopropyl alcohol, wipe the area where the support bolt touched the frame earlier so the adhesive patch on the plate has a good clean surface to stick to. Once this is done, reinstall the derailleur as mentioned in the prior paragraph and turn the support bolt counterclockwise until the outer plate of the cage lines back up with the large chainring.
It’s on the bike! However, that was the easy part. the next part is critical to setting it up right and making sure all the advantages of the new design are tuned and accurate. Like I mentioned earlier, the FD-9000 features 4 positions (two normal positions and two trim positions – one for each ring) called “low-trim” position, “low” position, “top-trim” position, and “top” position. The start of the adjustments begins with the low-trim position. The anchor bolt for the cable has two different routes that the cable can pass through and the tool mentioned earlier (TL-FD90) will allow you to see which route to choose for the washer (The cable routes the exact same in both cases, but the washer will either be positioned to the left or right). First, remove the anchor bolt from the derailleur and insert the TL-FD90 into the same hole the anchor bolt was in. Route the cable into the slot on the tool and observe if the cable is to the left of the indicator line on the tool or the right. If it is on the left, the anchor plate washer will point towards the left side (off position) and if the cable runs to the right of the indicator line, the plate should be turned to the right (converter or “on” position). The washer behind the anchor bolt is the only piece that changes position based on the converter tool setup. This setup allows the shifting performance is be at its best for each frame design. *I have found, over time, that there is almost no possible way to correctly hold enough tension on the cable when anchoring it to the derailleur. Hold as much tension on the cable as possible (usually best with small pliers) and be sure an inline barrel adjuster is installed in the cable routing by the handlebars or a frame barrel adjuster is set completely in.* While all of this probably sounds pretty confusing, the tool shows a small diagram on each side (on or off) in which to position the anchor bolt washer correctly.
Dura-Ace 9000 Front Derailleur “Converter” Tool, TL-FD90
Onto the adjustments! Once the cable has been torqued to 5-7Nm, we’re ready to get tuning. Ensure that the derailleur is in the low-trim position and shift the rear derailleur to the low gear (the biggest cog). Use the downtube barrel adjuster or inline barrel adjuster and turn counterclockwise until the inner plate of the derailleur cage is within 0-0.5mm of the inside edge of the chain. Then, turn the Low limit screw clockwise until it begins to move the chain and then back it off by an eighth of a turn. Now, we’ll adjust the cable tension by shifting the derailleur into the top-trim position (Shift to the large chainring and then click once on the shifter and notice the derailleur shift back by a small degree). While in the top-trim position and the chain still in the low (11) cog in the rear, use the barrel adjuster to bring the inner plate of the derailleur cage to 0-0.5mm of the inside edge of the chain. Once this is done, shift the front derailleur into the low position. Shift the rear derailleur into the 5th, 6th, and 7th gears to check for rubbing on the inner skid plate of the cage. If there is no rubbing in these three gears, shift to the 4th and 8th cogs and turn the barrel adjuster counterclockwise or clockwise 1/2 turn, respectively to finish the tension adjustment. If there still is no rubbing on the 5th, 6th, and 7th cogs, change the converter position of the washer to the opposite position and repeat the setup. Last thing is the top adjustment. Shift the rear derailleur into the top gear (1) and turn the top limit screw until the outer plate is within 0-0.5mm of the outside edge of the chain. Then, shift through all the gears and check your work.
It’s a lot more complex than derailleurs of the past, but I feel like every adjustment will be what makes this the best front derailleur by Shimano yet (of course, except the Dura-Ace Di2 9070). All of these steps help to ensure against dropping the chain, missed shifts, and less chain rub.
Since that was all a bit dry and technical, renew your flavor for the group by watching this video…
If you are a local cyclist to the area of Northern Virginia, stop by the shop and ask questions. If you’re abroad, comment or email me for clarification or questions.
Hey folks. In this time of year, the cold has swept many of us indoors to polish up our bikes or put them into trainers. However, even as we mutter to ourselves small encouragement that the warmth will return, we can definitely ride in super cold temps and conditions and feel quite epic as the miles get logged. It’s a completely different ballgame than warm weather riding and requires both adjustments to wardrobe and bike tuning. In this first part, I am going to go over some tips and technique for “winterizing your bike.” It will keep the trusty steed happy and healthy.
One area that I covered before in a prior post was the bottom bracket. One good trick is to wrap Teflon tape around the BB cups. This provides added protection when the rain, snow, and muck come calling. It’s like having a nice new seal that not only keeps the BB quieter from creaks and clicks, but also is added protection for the BB itself and the inside of your frame. While aluminum and carbon won’t rust like steel, I have plenty or horror stories of disintegrated BB cups and literal cups of water hanging out inside the frame. Below is a photo of a roll of Teflon tape and a photo of what the BB looks like when left unchecked.
Secondly, under the BB area of the bike is usually a cable guide that attaches to the frame with a small screw or plug. If your cables are routed this way, it’s a great idea to install small plastic tubes through the guide for your cable to run through. These plastic tubes are easily attainable at your LBS and most of the time, they’ll just give you them for free. As an added protector, I add grease inside these tubes as it will not melt away or dry like oil or Tri-Flow will eventually. It keeps the cable running smoothly, which keeps your gear running smoothly. Replacing a broken or frayed cable in sub-freezing temperature is a nightmare, even for a mechanic. Another great shield for cables is to buy an actual cable kit rather than stock cables. Many of these kits are only marginally more expensive and provide tubing for each point on the frame where the cable is exposed. It will stop grime and dirt from sneaking into the cable housing as quickly. The ultimate in these systems is the Gore RideOn cable sets that are completely sealed in Teflon tubing from end to end. Unfortunately, due to some untold reason, they are discontinuing the product. It is head over heels more expensive (about $140-160 for the whole brake and derailleur set), but I’ve seen daily commuters ride these without flaw for years at a time through some of the worst conditions this area sees. Below is a photo of the cable tubing and a photo of a bottom bracket cable guide.
Another tip that you can do at home very easily is wipe down your tires after every couple rides. Some Windex or Simple Green works great and you’ll have many more miles of riding on each set. Also, take a “pokey tool” (something pointy and sharp) and carefully pop little pieces of glass and rock that get imbedded in the surface rubber of the tire. Once the tires are wiped down, these are easy to spot and will prevent them from working deeper and causing a flat tube. You’ll also be much more aware of any defects or larger cuts before discovering them by a flat tube on the trail. My all-time favorite winter riding tire is the Specialized All-Condition Armadillo Elite 700×25. With a Kevlar lining built into the tire, I can ride over hill and dale with confidence that sticks and glass and potholes won’t be able to puncture. They can last several thousand miles and the folding version of the tire has a great feel on the trail.
A synthetic or leather bar tape (for road bikes) will also be an advantage to your cold weather trips as it doesn’t tear or wear nearly as fast as basic cork and gel tapes. Fizik makes a great “suede” tape that will last and last through winter riding and also keeps my hands a bit warmer.
For the cyclists with enough time on their hands, I highly recommend waxing your frame once or twice a year. Just like the beautiful shine looks on your car, your bike will both look great and water and dirt will have far less chance to stay stuck on the frame. You can also wax the components. The crank, in particular shines up well and I’ve noticed mine stays clean for far longer with less maintenance than without it. Considering some bicycle cranks range in price from $100-1000, I like to keep that investment as long as possible. However, I do not recommend using wax-based lubricants during the winter. Teflon lubricants will work just as well (if not better) and come in a variety of “thicknesses.” Rock and Roll Gold has been a stalwart protector of my chain for years and it keeps it both lubricated and clean. With wax-based lubricants, the chain stays lubricated for longer, but has a better chance of spreading the wax all over the bike (which is difficult to clean and can corrode some anodized parts) and trapping dirt. This is a highly debated topic, as some cyclists will claim the opposite. Out of all the bikes I have worked on (many many many), the bikes with wax-based lubes require much more time to clean and maintain while regular application of Teflon lube on bikes is quick, easy, and very clean.
A little more labor intensive care that will reap large benefits is taking fine steel wool to the metal braking surface of your wheels every two weeks of riding. In addition to removing grime and brake dust buildup, it gives the pads a better “bite” on the rim, stopping you more effectively and without squealing. Wiping brake pads as well will aid this and a small piece of fine sandpaper can revamp the surface of the pad and remove small bits of rock and metal that get imbedded in the pad just like I mentioned with tires. Those little metal pieces wear away at the rim and cause poor braking, squealing, and fine grooves in the rim metal. If you ride often during the winter season, salmon colored pads are made to aid in these conditions and are a specialized compound. KoolStop makes a great pair of thin line pads that will allow mud and dirt to shed more effectively and feature the salmon colored compound.
Last but not least, if you’re planning on hauling your bike on a car rack in poor weather, I highly recommend a product called a Chain Johnny. It’s a great invention that covers and protects the drive-train of your bike. Even though it’s from a company that makes wax-based lubes, I think it’s one of the smartest investments to keep your parts from corroding with all of the salt VDOT piles on the roads before and after snowstorms.
If you know of any other useful “winterizing” bike tips, feel free to contact me or post a comment and I will try to include it in the article or expand upon it. Thanks for reading. Next stop, “winterizing” yourself for riding.