Two Nice Recent Builds

There have been a couple nice builds going out at the start of this fall season and I wanted to share a couple eye candy photos of them.  Even a short test ride displayed the ride quality top end components and frames have to offer.  Parts List after each set.

Specialized Venge ViAS Pro Disc –

Specialized Venge ViAS Pro Disc –

Shimano ST785 levers / calipers, Dura-Ace Derailleurs (Di2), Roval CLX60 Disc wheelset, Specialized Carbon FACT crankset

This is really neat to build since we had some challenging times with the rim brake model earlier in the year.  Once the front brake dilemma was figured out, it was a matter of following a series of steps, but the pre-routed lines through the frame wer only marginally difficult to correctly measure and feed through the stem and the handlebar.  The routing was pretty tight, but not kinked due to it being hydraulic rather than cable actuated.  The paint was really nice too with the minimalist fading of grey and black.

Pinarello Dogma F8 Team Sky Edition –

Pinarello Dogma F8 Team Sky Edition –

Shimano Dura-Ace Di2 Hydro groupset, Enve 2.3’s on Chris King R45 hubs with Sapim spokes, Centerline V2 rotors (6 bolt), Garmin Edge 820, Enve handlebars and stem, Arundel waterbottle cages, Dura-Ace pedals.

This bike felt so nice to take on the test ride before a final fitting.  It felt responsive and quick with a total sense of confidence in handling.  I felt zero ‘twitchiness’ and the wheels and frame absorbed the rough Arling pavement with ease.  The brakes can stop on a dime and still maintain a nice interval of modulation when descending.

Specialized Roubaix Future Shock

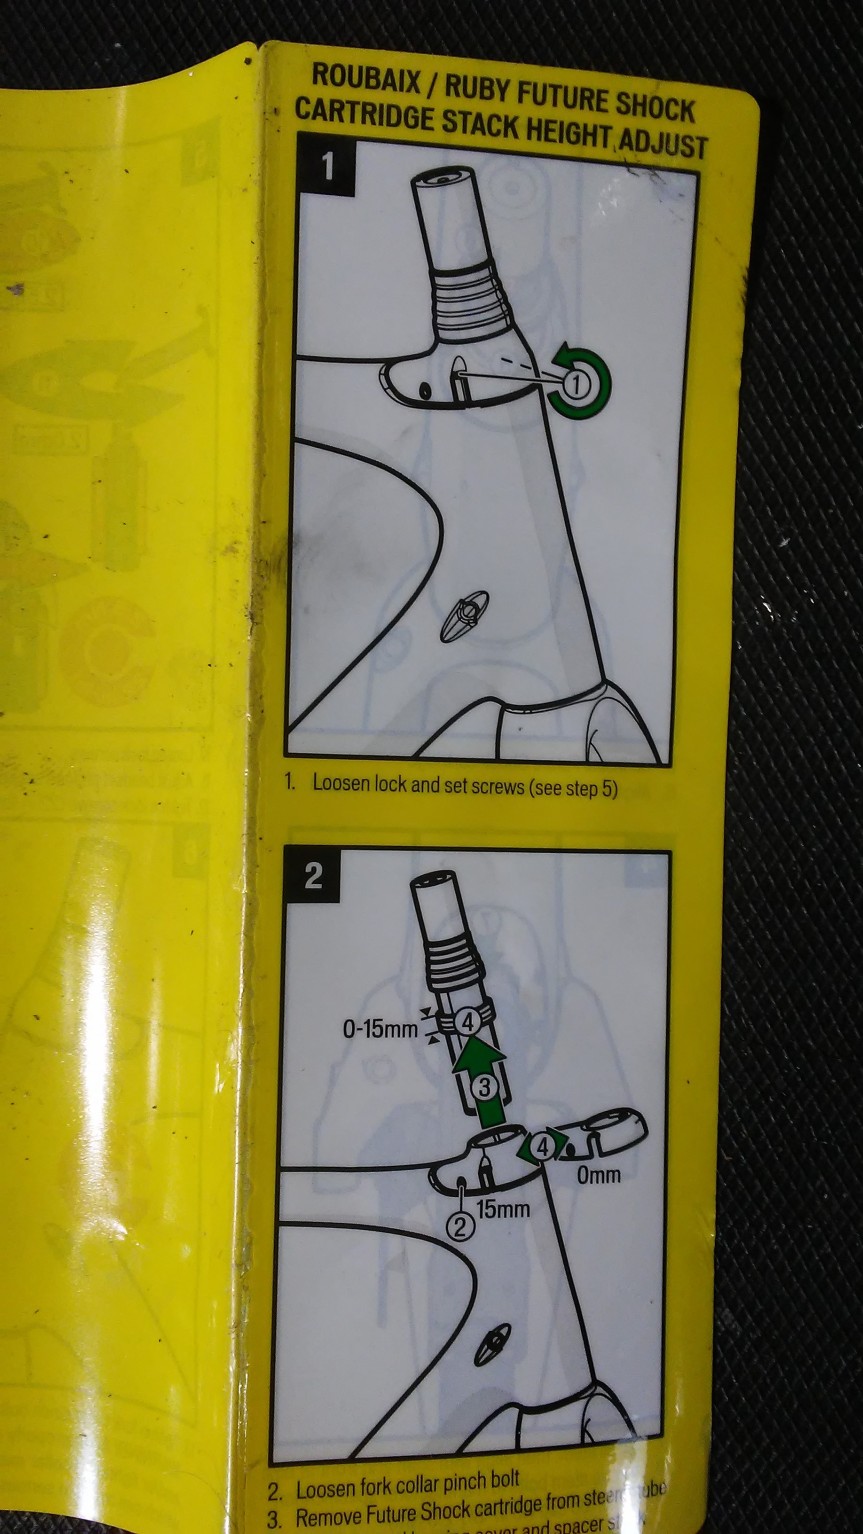
Hey everyone!  Quick post this morning about the new Future Shock from Specialized that is going on their Roubaix lineup and likely several other models (i.e. Diverge, maybe Crux) that I got a chance to build and ride the other day.  At first I was pretty skeptical about it and thought it was a lot like the proprietary suspension on a K8S Pinarello.  Obviously different components and placement, but the nagging concern that parts for this might not be available in a few years.  However, other than one particular part, I find that the shock will likely last as long as the bike and does comes with 2 additional springs (of different gauge) that could be used down the road.  The springs are really well built and the cartridge everything fits into is very well made and contained in a single unit.  Possibly this tech will evolve into something like a BRAIN shock.

Riding it felt great and I observed that the suspension accurately stayed in the middle of the travel while riding, so forces from the ground were smoothed out as well as pulling on the bar.  Even with this ‘smoothness,’ the bike felt agile and quick.  The disc brakes continued from the prior model were quick to stop and powerful (thanks Shimano).  Overall, my impressions are good on this.  The bike was really thought out and they redesigned enough features to make it a very noticeable performance improvement.

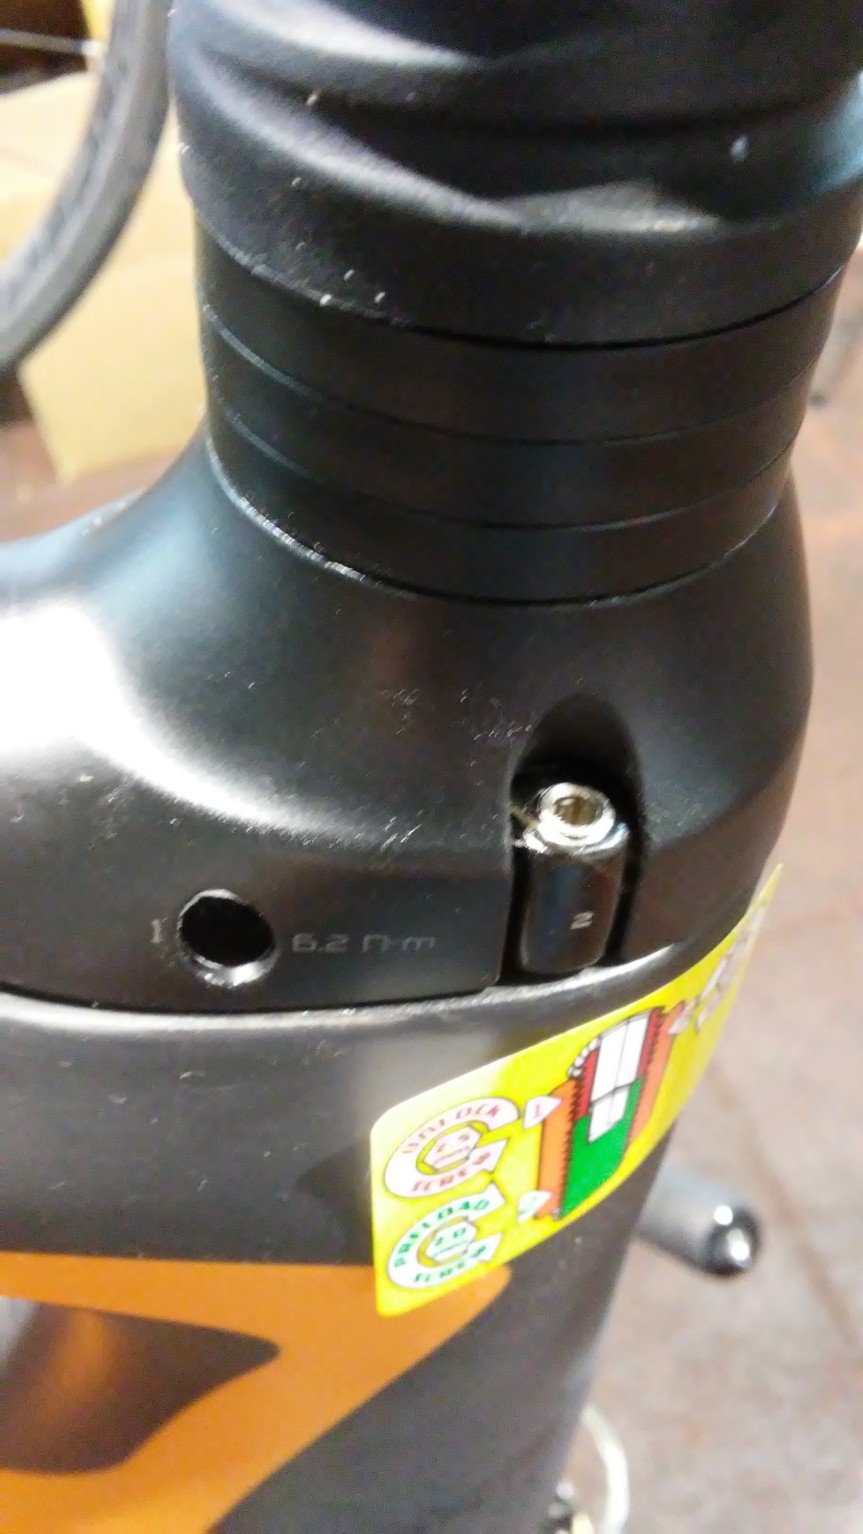
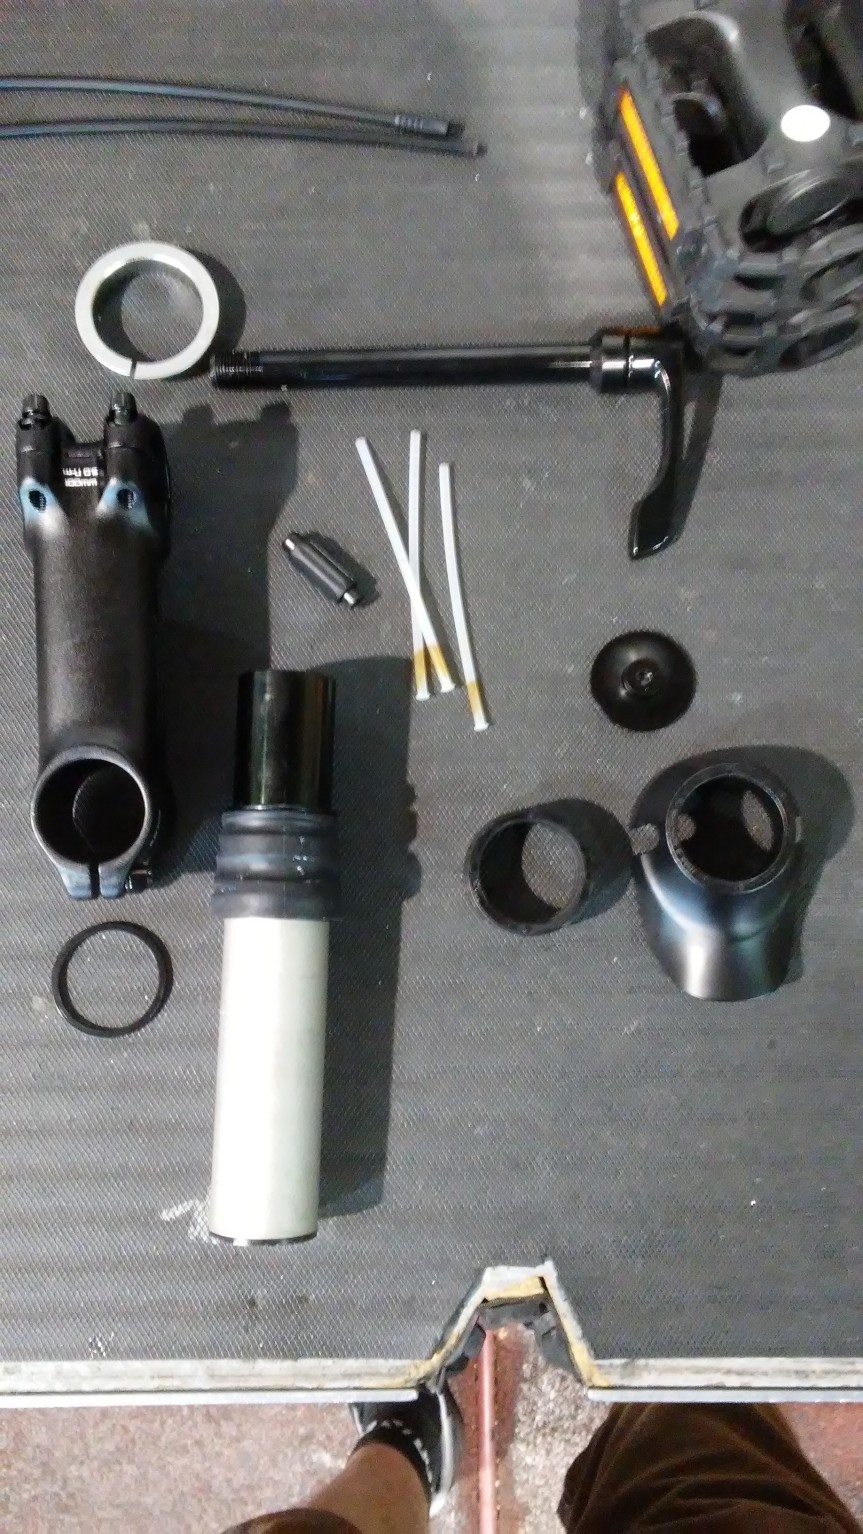
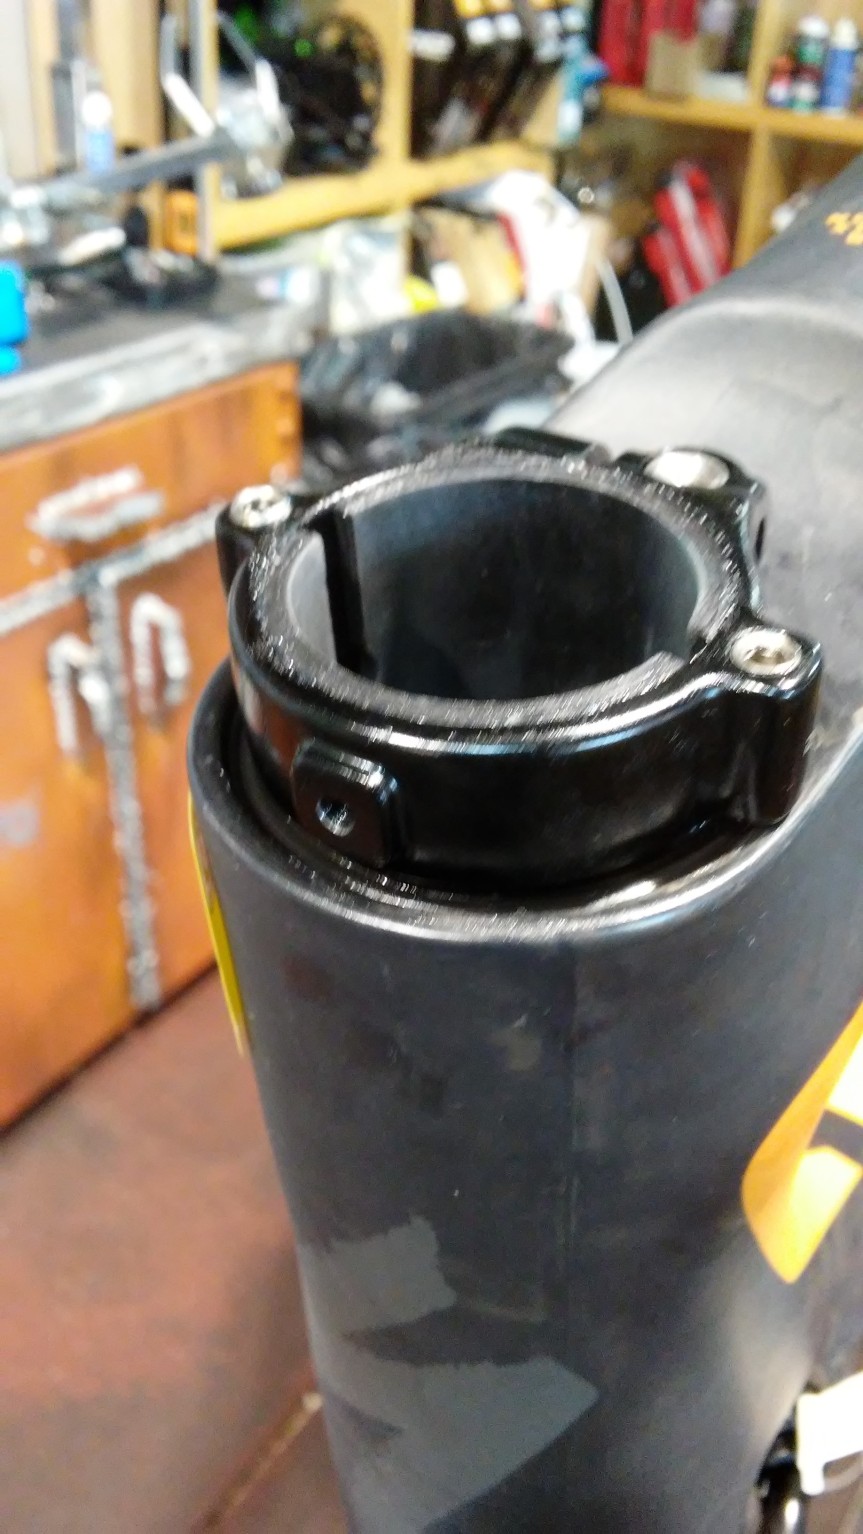
Now, the main thing that I question somewhat is the headset bearings for this bike.  Because of the Future Shock cartridge sits in a reinforced carbon steerer tube that is not 1-1/8″ or tapered, it requires special headset bearings.  I checked with pretty much all of our distributors and none of them have this bearing (not even close).  Thus, I hope Specialized has a great backstock of these and as a shop, you should definitely have some ready to go yourselves.  Other than that, I can see this technology making its way to other models and staying a features of the gravel grinder and cross category.  Here are some photos of the headset assembly.  Enjoy!

20161019_11132920161019_11141620161019_11145820161019_11205920161019_11213620161019_11275920161019_112809

First Thoughts and Review of the Specialized Turbo Levo Ebike

Hello everyone!  I have some exciting information and photos to share with you on the new Specialized Turbo Levo mountain bike.  One of our guys got to fly out to Moab this past weekend for some press release testing and rides and gave me the low down on many of the specs and what to expect from this new kind of bike.  V__24E7

First off, the Levo gets much of the DNA that exists in the Specialized Stumpjumper.  The bottom bracket is a bit higher though as well as shorter crank arms and chainstays to avoid striking rocks.  It has the shortest chainstays in its class.  It comes stock as a 6fattie wheel setup and can also be converted to a 29er.  The 29er, however, only gains a slight 6 watt gain over the 6fattie.  My thoughts would be that the bike will be most stable with the larger tire.  It also has a low center of gravity to help keep it stable. The rear shock has been specifically tuned to for the additional weight of the bike.

The Levo comes in three configurations.  The SWORKS weighs in at 42lbs and will cost about $10,000, the Expert level weighs in at 44lV__5B4Abs and will cost about $6-7,000, and the Comp level weighs in at 47lbs and costs about $3,500.  The SWORKS and Expert level Levos are equipped with a 504 Wh battery and the Comp comes with a 400 Wh battery.  Both are Lithium ion batteries that use the same cells that exist in the Tesla.  A Tesla has 8000 cells, where a Levo has 40 cells and the Turbo S has 60.  So, that’s a pleasant feature because cheaper cells usually do not react well from vibration (much less from jumps and drops).  The battery weighs 9lbs.

The motor is integrated into the bottom of the downtube and has a 250 watt nominal power with a peak of 530 watts and a torque of 90Nm.  It is definitely the smoothest on the market and extremely quiet with a Gates belt drive.  In order for the motor to engage and apply power, torque must be sensed on the pedals and the rear wheel must have rotation.  The power meter to sense the torque in hidden inside behind the rear rotor.  This is great because if there is no movement, but you are pressing on the pedals, the bike won’t engage and lurch forward.  it will only apply the power once you are moving and pedaling.  This makes a lot of sense because you don’t really need the motor part when going down hill for the most part.V__71EC

Both the motor and the battery are Bluetooth and ANT+ compliant, which removes the need for an LCD screen.  Diagnosis, battery level, and other features of the state of the bike are communicated to either your phone (via the Mission Control app) or through the Garmin Edge 1000 or 520.  The harness for the battery is magnetic and (once the bike is off) can be easily removed and charged on or off the bike.  The motor is also removable and can be diagnosed through the app.

As far as the ride quality, it is top-notch.  A 3-5 hour ride is easily feasible for a single charge, which is mostly due to the mid motor setup versus the hub motor.  The field test rides done in Moab were almost 50 miles together with about 5,000 feet of climbing.  The turbo mode is almost too much power and can cause skidding, but is fantastic to be able to ride to the trails and back.  Most of the effective riding was best done at the Eco mode with a little Trail (more robust) mode here and there.

Climbing is exceptionally great (it was able to clear two foot ledges with ease uphill).  The bike audibly tells you to change gears if the motor is working too hard.  A higher pitched whine from the motor occurs if you are in too low of a gear and a deeper low rumble if you are in too high of a gear.  Like most full-suspension mountain bikes, it is best to be seated while climbing .  Because of the extra power, 3 mile ascents are much easier to handle without issue than with a standard mountain bike.  For descending, it handles great and the extra weight keeps you close to the ground.V__8F0FV__1281

So, additionally, Specialized has gotten together with Strava to create a new ebike category on segments, which will have their own KOMs and leaderboards compared to regular mountain bikes.  In summary, I think this is going to be an awesome bike to let people have a great mountain bike ride even if they are not exceptionally experienced.  It is spec’d really well and I have followed social media of people testing them in Europe for a while, so I would expect that most of the bugs have already been worked out.  More to come when we get one in the shop to build.  I’ll post a good article of the build and closeups of all of the features it has to offer.

Installing and Troubleshooting the Turbo S Wiring Harness

It’s been a little time since I had a good update of info and experience with working on the Specialized Turbo S (in this case, the first gen version) and have had notable experiences that deserve to be logged and written about.  So, here goes.

In my last post, I was working with a Turbo S that had error code LEDs for the 1st, third, and fourth on the battery and would subsequently turn off after about five seconds of turning it on.  I have been working constantly with Specialized on this one and the valuable experience I have gained will be explained below.  In the end of my discussions with the Turbo experts at Specialized, it was determined that the wiring harness was malfunctioning and needed to be replaced.  It was estimated at about a two hour job, uninterrupted and I think that accurately reflects the time it takes for someone familiar with the Turbo.  Below, I will run through the process and how to do it with advice on what to avoid doing or what helps the install go more smoothly.  As of now, this is the first coverage I can find anywhere on the Internet on how to do this, so I hope the documentation is thorough and helpful.

After swapping several of the components with new ones from a known working 2013 Turbo S, I encountered the same errors on a consistent basis (even with two other batteries).  When the wiring harness came last week, I was psyched and ready to dive in.  I took photos of the whole process so you can visually compare when working on this project yourself.

The first part of the project involves removing the old wiring harness first.  This is literally every wire that runs from the handlebar connectors (the brake motor disengage, the mode selector, and the control interface) to the back of the bike.  First, remove the small 2.5mm hex bolts that attach the frame stops/guides for the wires on both side of the frame where the downtube meets the headtube.

WP_20151015_13_37_37_Pro WP_20151015_13_37_47_Pro WP_20151015_13_37_52_Pro WP_20151015_13_38_03_Pro WP_20151015_13_47_33_Pro WP_20151015_13_47_42_ProWP_20151015_14_53_36_Pro

Once this is done (by the way, put these tiny screws in a magnetic parts bowl, because you WILL LOSE THEM OTHERWISE), remove the anchor bolt on the non-drive side of the bike (which holds the main part of the wire harness in place).  It is a 6mm bolt that uses blue loctite.  In addition, this is a great time to replace the rear derailleur cable as the housing where it fits into the rear derailleur housing stop usually is bent and stretched.  Clip the housing on each end clean.  Any exposed housing casing will cause friction in the cable and affect shifting.  In the fourth photo, you will see a tiny 2mm screw right in front of the wire harness in the battery compartment.  You MUST remove this screw (which holds the brake housing securely under the downtube).  More photos below and then the next step.

WP_20151015_17_25_10_Pro WP_20151015_17_25_01_Pro WP_20151015_13_50_49_Pro WP_20151015_13_51_35_Pro WP_20151015_13_57_36_Pro WP_20151015_13_57_44_Pro WP_20151015_13_57_52_Pro WP_20151015_14_00_17_Pro WP_20151015_14_01_19_Pro

When doing this project, I suggest removal of the crank.  While the bottom bracket isn’t necessary to remove, uninstalling the crank is a good idea so you have better angles of working with the bottom bracket access point on the frame.  It’ll make your life a whole lot easier.  I also discovered that you only need to loosen the two hex bolts (5mm) inside the bottom bracket access point in order to successfully route the harness.  Each individual wire (3 of them, black, red, and orange) is easiest to pass through the routing individually.  When pulling the wiring harness center out of the frame, it’s a good idea to take a nice flat tip screwdriver and carefully pry the rubber casing on the harness wires going down the battery compartment before pulling out the main unit.  The connection plug to the front wiring (7th and 8th photos) must be routed through the frame.  Allow some slack ont he wire from the frame stop and push the frame stop perpendicular to it’s mounting position through to the inside of the frame and then the wire connector itself.

WP_20151015_14_04_49_Pro WP_20151015_14_04_54_Pro WP_20151015_14_05_01_Pro WP_20151015_14_06_55_Pro WP_20151015_14_07_08_Pro WP_20151015_14_09_50_Pro WP_20151015_14_09_58_Pro WP_20151015_14_13_12_Pro WP_20151015_14_13_21_Pro WP_20151015_14_13_28_Pro

Take a good look at the above photos and then I will explain them.  At this point the bulk of the wiring harness from the front of the bike should be ready to remove.  Now, we take a look at the progression of the wires through the bottom bracket and out to the hub motor and the rear taillight.  The rear wires are encased in  “Chinese finger trap” style mesh once they exit the frame to the hub motor.  As you compress its length, it widens and allows removal.  The new harness came with heat shrink tubing to cover the connections and the mesh harness is used again to protect the wires running into the frame.  The fittings for the red, black, and orange wires are compression fittings into the plastic plug that connect to the motor.  It takes a significant amount of pulling force to remove these, but they do so without much of a problem.  The key is installing the new connectors back into the plug, which  I will cover shortly.  The next few step include literally pulling on the old wires to get them to exit under the pressure plate (the motor and communication wires) and the seatpost light wires (through the seatpost and then through the seat tube).  By the way, I think one of the hardest part of the install is the installation of the seatpost light.  However, that is a sweet feature of the bike and requires considerable attention.  i show a decent way to do it, though I think there might be an even better way.  Here is the next series of photos.

WP_20151015_14_25_14_Pro WP_20151015_14_26_17_Pro WP_20151015_14_31_17_Rich WP_20151015_14_35_00_Rich WP_20151015_14_36_35_Rich WP_20151015_14_37_01_Rich WP_20151015_14_39_29_Rich WP_20151015_14_39_02_Rich

The next part is great.  This is where the skill comes into play.  Before the installation of the new wiring harness, I suggest using an air compressor with a ‘crack pipe’ disc adaptor to clean out the frame of the dust from usage and age.  My buddy, Curtis, photobombed the second photo pretty well and helps me keep focus during these diagnoses.  To loosen the battery pressure plate mounts so you can route the wires, use a long L-hex 5mm to turn them counterclockwise until you can move the plate from the battery compartment with your hand a decent amount.  Note that the frame routing for the rear chainstay motor wires is quite small.  I suggest you route each under the pressure plate and the chainstay separately.   Route each under the pressure plate and then each through the chainstay (check the last photo above for the entrance point).  The wires are pretty stiff and pass through the frame relatively well.  Once you see each (with a nice flashlight), use a pokey tool to route them out of the chainstay. At this point, slide the mesh protector onto the wires and the shrink wrap from the earlier photos.  This will make your life easier in the next few steps. Apply a tiny tiny tiny amount of  dielectric grease to the brass collars of each wire before pushing into the original plastic plug.  This will help seat each wire in the plug a little easier.  It is tough to push them through.  Use a small blunt pokey tool to push from the rear of the plug.  I did it successfully on the second attempt.   Then I I hit the shrink wrap material with a lighter and tightened to the connector and wires.


Once this is done, it’s a matter of connecting everything.  To route the seatpost light wire, I ran a brake wire cable through the tubes and out the seapost drilled hole, taping the connectors in a row to minimize diameter of the hole it had to exit through.

WP_20151015_17_14_23_Pro WP_20151015_17_14_32_Pro WP_20151015_17_14_43_Pro WP_20151015_17_24_46_Pro WP_20151015_17_24_52_ProWP_20151015_15_00_16_Pro WP_20151015_14_53_36_Pro WP_20151015_14_51_59_Pro

Once I had done this, I realized the new harness use d a male and female connector for the rear taillight. Well, I rewired the old connector so it fit, and it worked flawlessly. 🙂

Here is the last of the install photos.

WP_20151015_17_25_01_Pro WP_20151015_17_25_10_Pro WP_20151015_17_25_18_Pro WP_20151015_18_18_27_Pro WP_20151015_18_18_52_Pro WP_20151015_18_19_02_Pro WP_20151015_18_22_37_Pro WP_20151015_18_22_55_Pro

I also realized that the control unit docking station wire was malfunctioning, so I replaced that as well from a known working Turbo S in the shop.  Other than a small few inconsistencies in startup, the firmware was updated successfully as well as the battery communication issue software.  I am still waiting to hear back on the error reports from Specialized.  Bike performs successfully 90% of the time, but a final confirmation from them is necessary.  Thanks for tuning in.  More to come.  I am compiling a great Campagnolo EPS diagnosis article that should be up in the next few days.


SNC, David Polk

Further Troubleshooting the Turbo S & Other Fun Things

Well, I had two choices when I got home from the shop.  The first was to update my recently built cyclocross bike with some newly acquired 10 speed 105 and Ultegra (along with two nice red Specialized rib cages).  The second was two write a new article on first thoughts with the newest edition of the Turbo, which has split into several more models and options and really continues to develop the lower price point and affordability.  So, thus, I am writing the article (mainly because I don’t really care about 9 versus 10 speeds for a few more days of riding around in dirt and gravel.  Pretty sure it is working quite well).  In addition, I have come across some good troubleshooting problems and solutions (particularly the first gen Turbo S from 2013-14).  In fact, the solution for the issues in diagnosis are still in the process of being resolved.  However, due to some great communication with the lead Turbo experts over at Specialized, we have a solid direction toward fixing the issue and this will really mark the first time since they’ve arrived on the market that one can assess the long term durability and dependability.  I will go ahead and say that I certainly think it is worth it and, if you ride regularly (or wish to) year round, it’s a far better bargain (particularly in the DC metropolitan area) that sitting in traffic all the time with a car.  Let’s dig in!

First, I had a new customer stop through recently with an amazing modification of a 2015 Turbo S that made my eyes pop thinking about future possibilities with ebikes.  Her name was Marissa Muller and her website is http://www.marrissamuller.com.  Her Turbo had not only a aero wind shield, but could run indefinitely with the solar panel she attached to her Burley bike trailer.  Unbelievable!  Using extension wires with Rosenberger connection plugs (the same kind on the Turbo), she outfitted it so the Turbo could keep charging at a rate slightly more than the rate of battery discharge from riding it.  Essentially, it charged faster than you could deplete it!  Carrying an extra battery (which apparently wasn’t needed), this woman rode cross-country on an ebike pretty much without ever plugging it in.  Think if the frame was covered in super efficient solar panels.  Never charge the bike.  Use the free energy of the sun.  It’s both a noble concept and challenge to make it happen.  Unfortunately, adding this technology directly into the bike now would make the price skyrocket to a likely 15k or more.  So, rigs like these now are proven for the meantime and is a great way to tour the country without fear of running out of battery power.  Here are some photos of the setup!

WP_20150817_12_55_17_Pro WP_20150817_13_47_34_Pro WP_20150817_13_47_45_Pro WP_20150817_13_47_52_Pro WP_20150817_13_48_59_Pro WP_20150817_13_49_04_Pro WP_20150817_13_49_15_Pro WP_20150817_13_56_02_Pro

She was super nice and had a great knowledge base to understand how the setup worked.  With extension Rosenberger connectors, she was able to route a cable from the solar panel to a the front of the Turbo into the charging port.  It was by far the best mods I have seen yet on an ebike.

Concerning the troubleshooting, I had a customer come in from visiting other shops with unsuccessful results in need of service with his Turbo S (first gen).  When the battery was started up, it’s on-board diagnostic LEDs showed errors for the motor, light, and remote.  The battery would finish the diagnostic and then immediately shut down.  This is a first for me.  After speaking with some of the experts at Specialized on this case, they suggested I take a look at all of the connections to make sure they were tight and not discolored.  Apparently, while a rare case, some of the Rosenberger connections would have one of the two pins discolored dark, which would mean it somehow went bad.  This was not the case as you can see in the photos.

WP_20150924_11_01_46_ProWP_20150924_11_04_49_Pro  WP_20150924_12_35_57_Pro WP_20150924_12_36_08_Pro WP_20150924_12_36_33_Pro WP_20150924_12_36_49_Pro WP_20150925_18_27_50_Pro  WP_20150925_18_32_50_Pro WP_20150925_18_33_03_Pro WP_20150925_18_33_08_Pro WP_20150925_18_38_15_Pro

I even removed the central core of the wiring harness at the top of the downtube to check for bad connections and/or frayed wires.  As you can see, there were none that stood out as bad.  I triple checked the regular connections of wires at the front of the bike (where the motor disengage connects to the remote and mode wires, and then into the bike).  The connection for the light was not quite tight and when tightened, it responded well by turning on correctly, though it still read as a fault in the system.

WP_20150924_10_59_30_Pro WP_20150924_10_59_46_Pro WP_20150924_10_59_58_Pro WP_20150924_11_00_13_Pro

After inspecting everything and also trying to remove and reinstall the battery several times (and unplugging the motor connection near the non-drive side rear dropout and cleaning it with electronic component cleaner), I am of the assumption at this point (along with the guys at Specialized) that the wire harness may indeed be worn out.  In an effort to fully check this before replacing, I will be performing a diagnostic of the ebike with the newest edition of the software.  Once this has been confirmed, I will update the article accordingly and link this one to the other articles I have on the Turbo.  It is reasonable that the wire harness is worn out for a three year old bike, but maybe not since this one was purchased only about a year ago.  Either way, it seems to be solvable issue.  If the wire harness does need replacement, this is an extensive installation that will require quite a bit of time.  I plan to record this process with my GoPro and will post it here with the conclusion of the article.

On a side note, the battery error report showed some irregular data as well as the absence of data regarding some controls of the motor and battery cells.  For instance, there is a field of data readings that mention a note every time a permanent failure occurs and this data was completely gone from the report.  Anyways, once the issue is resolved, the Turbo should be back up and running.  I also used a different battery from a brand new Turbo with the same exact error LEDs, so this is also why I believe the issue is not the battery itself, but the communication between it and the other components.

Me working on fixing these ebikes...


Congratulations to Peter Sagan today on winning the UCI World Road Championship.  It was such an epic win and was smartly finished by attacking on the cobblestones.  It was the type of race where perseverance and smart racing skills took the field.  Let’s look forward to some special edition painted Specialized bike for him winning.  Thanks for tuning in!


  • SNC

Building the Specialized Venge Vias

Here are some more photos of building up the bike this morning and then some photos of afterward.  There were many good concepts behind the hidden cable design and mounts as well as possibilities for having Junction A externally mounted beneath the adjustable Garmin mount on the front of the handlebars.  Some of the setup for the front brake is difficult and I have to trim the cable several times and re-sleeve it before it actuated correctly and smoothly.  The routing over the the steerer tube of the brake hoses and Di2 wire was well thought out and (while tight) came together great.  The addition of the carbon waterbottle cage (included) with the SWAT tool and mounting bracket below the cage was a nice touch.  We immediately went for Supakaz Black Kush tape instead of the stock white and also replaced the white Power saddle with a black one to stealth it out.  All in all, it built nicely and looked good in the final photos.  Final weight with the cage and SWAT (no pedals) as stock build for a 56cm was 17.57 lbs.  I am just going to display all the photos below right after each other so you can see the details.  Message or comment with any questions!

SpecializedVengeVias001 SpecializedVengeVias002 SpecializedVengeVias003 SpecializedVengeVias004 SpecializedVengeVias005 SpecializedVengeVias006 SpecializedVengeVias007 SpecializedVengeVias008 SpecializedVengeVias009 SpecializedVengeVias010 SpecializedVengeVias011 SpecializedVengeVias012 SpecializedVengeVias013 SpecializedVengeVias014 SpecializedVengeVias015 SpecializedVengeVias016 SpecializedVengeVias017 SpecializedVengeVias018 SpecializedVengeVias019 SpecializedVengeVias020 SpecializedVengeVias021 SpecializedVengeVias022 SpecializedVengeVias023 SpecializedVengeVias024 SpecializedVengeVias025 SpecializedVengeVias026 SpecializedVengeVias027 SpecializedVengeVias028 SpecializedVengeVias029 SpecializedVengeVias030 SpecializedVengeVias031 SpecializedVengeVias032 SpecializedVengeVias033 SpecializedVengeVias034 SpecializedVengeVias035 SpecializedVengeVias036 SpecializedVengeVias037 SpecializedVengeVias038

The New Specialized Venge Vias

Hey everyone!  We’ve just got the one of the first Specialized Venge Vias bikes in the shop.  More photos of the completed bike to come later today!  It definitely looks sleek with the aero brakes and curvy handlebar.  The 64SLX Rapide wheels seem really light and also quite aero.  I’ll try to have a few photos of actual weights for the wheels and the complete bike with Shimano Dura-Ace Di2 11 speed.  While the brakes look tucked into the frame, they seem easy to work on and I noticed all the little bits in the packaging made sense with flexible brake noodles leading to the brakes and the wires and junction tucked away nicely in the stem and under the bottom bracket.  One thing I really liked the concept of was the control unit and charging port located under the bottom bracket shell in a nice protective case (Junction A).  This means Junction B is placed up at the stem (hidden away), which is reverse of how you would normally install them.  More to follow!!!

Junction A inside BB shell case Aero Handlebar Rear Brake CLX64 Rapide wheels Vias Interesting downtube shape No brake mount holes here!  Aero front brake A very proprietary stem, but looks awesome Top view of stem Ceramic BB, SWORKS crank Front brake from behind the fork Another shot of brake. Rear brake Another rear brake photo Comes with a Quarq power meter!!! Charging port for Di2

2015 Turbo and Turbo X Preview / First Thoughts

The 2015 Turbos have arrived! I was psyched on Friday to see the truck roll up with four brand new Turbos and 1 new Turbo X (with a  suspension fork and knobbier tires).  We had been expecting them and I started the builds right away.  I documented the process of unpacking and setting up the bike and the pros and cons of that and exploration of the features as a quick first look.  I am sure we will be seeing them find homes shortly and will continually add summary progress in a troubleshooting article that will build with time.

They were the middle range motor/battery option which seemed to top out at around 21 mph with moderate effort.  Both models feature some great new tech options and builds upon prior years’ success.  They substituted their own branded stem on both models this year instead of the Crank Brothers model from prior years.  The key and battery lock look like a different make and the disc brakes are Formula C1 models.  Much of the rest of the bike is the same.  The Turbo X front light mounts on the handlebar, which I prefer over the Turbo mount at the crown of the fork.  The Rock Shox Paragon 50mm (regular QR) air fork with remote cable lockout is a nice touch on the Turbo X. It is also spec’d with Trigger tires, which I believe might be better suited to substitute Electrak tires.  The first nine photos are of the Turbo X and the rest are of the Turbo and its accessories.  The LCD controller looks the same and mounts in conjunction with the shifter and brake lever.

Update and The Ridge

So, the Turbo wheel was sent back to Specialized for recalibration of the motor. When it came back, it was an entirely new wheel. While the defective motor was replaced, the newly installed one worked perfectly and has since been performing without flaw. It was a pretty quick turn around (about a week).

I’ll be back to posting on both some technical articles and a few on the biking culture in general. With the season slowing down a bit, I now have better time to devote. Also, concerning biking culture and news, I have been in the heart of the situation of cyclists being called terrorists in Washington D.C. and have been listening to many sides of the story as it has resurfaced a couple days ago on the Kojo Nnamdi show on NPR. Both sides have strong opinion and reasons for concern and I think it’s a good time to highlight some of it from a practical standpoint.

Also, the new Danny Macaskill video, “The Ridge” is quite amazing and you should watch it immediately.

Specialized Turbo S Troubleshooting and Diagnosis Pt.1

Welcome to Part 2 of 3 in my Specialized Turbo S Long Term Review.  I feel like this is some of the most essential information that I can apply in one place that will keep Turbo pedalelecs running beautifully.  However, I do feel that there is a “low-ceiling” limit to the depth that the Turbo can be maintained — even by an experienced and well-equipped shop.  In certain instances, the bike may have to be sent to the factory.  I am of the belief that this is being addressed and the bike will become even more modular and accessible.  That being said, there is a ton that will be covered here and includes several years of work and knowledge.  While I will be mostly highlighting troubled issues, the Turbo overall has been very trouble free and generally without issue.  This just compiles issues from many Turbos I have serviced since their release.

Onward.


So, I turned on my Turbo and started pedaling and the motor did not kick in as expected in Full Active and Eco modes.  What’s up with that?

I am starting with this problem because I think it has occurred more than any other issue.  There are a number of symptoms that cause it to happen and a number of solutions.  First, the battery is nearly dead.  Charge it up and try again.  The next thing I would try is to simply turn it off and turn it on again to try it.  This occurrence has spanned several Turbo S bikes on a rare occasion and has been remedied every time in the shop.  The next reason it might not turn on is that the battery may not have been installed properly or the pressure plate at the bottom of the battery “hanger” is not correctly adjusted.

With the battery pressure plate, I have found it to be different on each bike and definitely has a “correct” pressure for the Turbo to function right.  On the bottom of the bike behind the bottom bracket is an access plate that is secured by small 2mm bolts.  Remove these and set aside in a magnetic parts tray so they don’t end up lost on the ground.  Once the anchor plate has been removed, look inside and you’ll see wires, a couple hex bolts, and the shell of the bottom bracket.  Locate the 5mm hex bolt right in the center anchored into a flat plate.  This is an adjustment bolt for moving the battery up and down within the battery dock.  It provides pressure against the battery so vibrations do not disrupt the connection at the opposite end of the down tube.  To be noted, one would likely expect the phrase, “Why not just crank that thing down and really lock it in there?”  Well, here’s why.  If the motor does not seem to be engaging as aforementioned, this same issue can occur if the battery is adjusted to tightly in the dock.  Just as the battery has a little “wiggle” room, so does the connection to the battery inside the frame at the top tube and head tube junction.  If you remove the battery and look at the top of the battery dock, you’ll see where it plugs in.  With your fingers or a scribe, you can definitely see gaskets on the side of the connection and its ability to move slightly up, down, left, or right with a small amount of push.  The general rule is to begin tightening the pressure plate while using your free hand to try and move the battery up and down in the frame.  If you hear any sharp noises when it contacts the top or bottom, continue tightening.  Once there is little movement (0.25-0.5mm), stop tightening and use the key to remove the battery.  If it is too tight, it will be difficult to get the battery out.  I have found that each Turbo is slightly different, which is a great reason to have the plate for adjustment.

Another item to check is the connections between the brake and the control unit and the connection to the wire coming out of the frame.  Also, as a measure of being thorough, there is an additional connection inside the frame at the head tube where the light plugs into a parallel connector with the control unit (Several times, fault signals on the battery will indicate the light and control unit both having an issue when it is mostly one or the other).  By checking these connections, I imply:  Are they tight and correctly aligned for the individual connector pins? Have you applied a tiny amount of dielectric grease to the threads of the connectors? Are the connections and wires constantly rattling or loose?  Try checking each of these regularly when servicing as a quick way of eliminating them in the event of an issue.

So, I turned on my Turbo and everything started up, but a flashing code reading “short circuit” is displaying on the control unit?  Is that bad?

Well, it’s not necessarily good, but can be fixed easily.  Sometimes, constant vibration, continued exposure to the elements, and leaving the rubber charging cap off of the Turbo for extended amounts of time can cause an interruption in the electrical system and send a red flag to the control unit.  It’s a feature designed to override the system much like a circuit breaker so no damage occurs to vital components.  By using the Turbo diagnostic tool plugged into the frame (with battery in) and into a laptop, you can run the diagnostic software and release the hold on the circuit with a convenient button on the screen.  This software is a very important tool in confirming that the motor, battery, control unit, and lights are working properly and displays a wealth of information and reports for keeping Turbos happy and healthy.

My Turbo has gone insane and decided to run at 28mph like a throttle as soon as I hit the pedal.  I don’t even need to pedal. Glad it’s spec’d with great disc brakes.  Does it need an exorcism?

Not quite.  In the early days, Specialized might have taken this approach, but with the “Innovate or Die” theme currently in trend, we now know it’s quite real. This issue has only occurred once, yet is important enough to catalog and solve for any future happenings.  In my prior post, I detailed the symptoms of the bike while it was secured in the bike stand.  I took the opportunity to  remove and clean some of the components on the bike and the frame (After slowly and carefully removing the kickstand, I have realized that unless it is absolutely necessary, don’t ever remove it.  It is tedious because of the frame angles to loosen and tighten the 8mm hex bolt and I found that it didn’t improve access to the electronics and pressure plate under the bottom bracket.  It is a very sturdy dual kickstand that stays tight and balances great.). That being said, I removed the bottom bracket (EVO386) with a socket and outboard cup adaptor and found plenty of access points into the frame to see the wires running to the motor and seatpost LED and the hex bolt adjustment for the pressure plate (5mm) and the lock mechanism with it’s integration into the battery release.  I wiped the battery dock and the battery with isopropyl alcohol.  The terminal connections were also cleaned with isopropyl and a swab.  With some time open in the service schedule, I also decided to remove the external frame charger / battery dock connection unit from the top end of the down tube to make sure all of the connections looked secure and free of debris and moisture.  Thanks to a well-sealed compartment, everything looked great.  I took notes as well on the direction, colors, and pairing of wires that interfaced with the unit.  Red and black paired wires run directly from this to the bottom bracket shell, under the EVO386 BB, and through the non-drive chainstay to the external port near the rear wheel.  A shorter set of these two wires also connects the battery dock connection to the external charge port.  Two sets of blue and brown wires run from the unit to the headtube and into the brake / control interface and also to the bottom bracket shell and into the seat tube to connect into the wires running from the saddle’s integrated LED through the seatpost. One triple set of wires (blue/brown/green) run from the external charge port in the frame to the top of the battery dock where the battery connects to the system.  Lastly, an orange wire runs from the front light to the connection with the control interface (wired in parallel).  As a side note, this is why the diagnostic on the battery will show both the light and control interface having an issue when it could potentially only be one of them.  Good things lights are pretty easy to check.

Once I had satisfied my curiosity of understanding the Turbo S better, I moved on to reinstalling the parts and activating the wheel like before.  I let it run continually for over five minutes with no discernible change.  Continuous operation, only to be paused by giving the brake a solid squeeze.  If the wheel was touched, the throttle would pick up again.  This was also true for pressure on the pedals.  In these situations, I was lucky to have another in the store to help eliminate components.  Taking a brand new rear wheel from the second Turbo (after testing to make sure it was operational), I installed it into the first and powered the system.  No activation of Full Active or Eco modes, but No Power worked as expected and Regen mode seemed more difficult than normal as mentioned with the original wheel.  This is the only area that I am not quite sure what to think of yet.  That’s what the techs at Specialized are for. Continuing with the diagnosis, I also swapped the battery with no effect.  Reinstalling the original wheels and batteries to each Turbo, I then swapped the control interfaces.  This also did not yield any effect.  With the original wheel, the throttle accelerated as before (One thing I might try today is to try both battery, control interface, and new rear wheel from the second Turbo into the first.).  The last thing I did was to put the wheel from the service Turbo into the new Turbo.  It accelerated to 28mph.  Thus, my conclusion (though I will wait for confirmation from Specialized) is that the wheel needs to be recalibrated–specifically the motor.  If this is the case, it will go back to the factory for a quick turnaround and then I’ll have an update on a future post about the issue’s resolution.  This was a great opportunity to fully inspect the bike from top to bottom, inside and out.

I am going to continue this post through the weekend with some other minor issues and fixes that will keep the Turbo S running smooth and fast, but figured that it’d be good to start posting the article for any feedback or questions.

Here are photos of the above parts:


More to follow!  – SNC