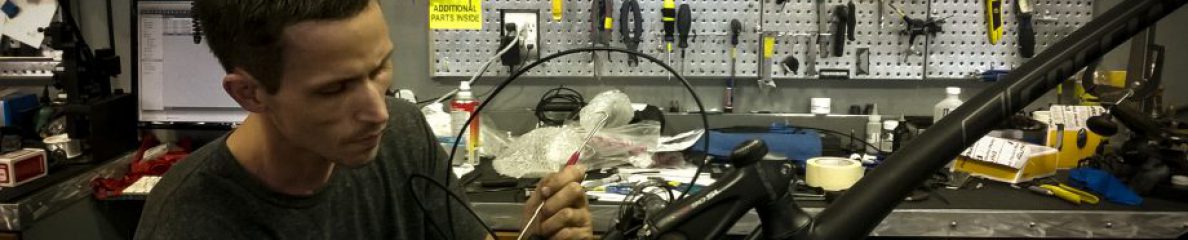
I was able to attend six of the eight classes offered at the 2013 Park Tool Summit. They were the following: Campagnolo, Cane Creek, FSA, Fox, Mavic, and Shimano. I am going to cover each one and what I thought were the best points to take and apply in the shop. Right below is a slide show of photos I took (sorry for fair quality with cell phone) before the summaries of each class.
This slideshow requires JavaScript.
Campagnolo:
The same instructor, who deals with just about every Campy warranty and issue in the US department, was informative and innovative considering that a pallet of half the working material was still somewhere between the headquarters and the summit. Inside views of the Romanian factories and the home factory in Vicenza, Italy. Before recently, Campy was high on security and secrecy to protect larger companies from gaining insight on their special technologies and process. Now, however, they have adopted a much more transparent view of both the parts diagrams and breakdowns and the environment itself in which the parts are produced. Because of the demand for such quantities of these quality components, special precise training was exacted for the employees of their two Romanian parts manufacturing facilities dubbed Mechrom 1 and Mechrom 2. Most of the final assembly of parts is done in these facilities. They have a great traceability program to ensure that the products and parts are accounted for and distributed correctly. For instance, every wheel built has a dot matrix code attached that contains information as to the individual that built the wheel and the exact final tension specs, ensuring the rider that the product is as perfect as possible.
Also, various innovations have been discovered and engineered by Campy that have spread to other industries because of the care and accuracy they hold their standards to. NASA aerospace chassis designs, the formula for casting magnesium (a very very light material), and the first magnesium wheelset are but a few of them.
Great focus on chain design was taught. Every chain created undergoes over 1200 lbs of force to “pre-stretch” them so they last longer and run smoother than any other chain. No rider can exert this type of force which entails literally zero broken chain other than if the installer does not install it correctly. Also, as a side note, installing a “quick link” voids the warranty as they believe only their chain pins meticulously pressed in will be strong enough to support it. In addition, they recommend installing the chain in the smallest chainring and smallest cog to get the right amount of tension.
Cane Creek:
It was obvious for this seminar that Cane Creek is highly focused on connecting riders together and sharing their experiences for the best ride possible. They seem to have an attitude of figuring out how to make each rider’s bike settings and technologies work best for that individual by developments in things like changing the angle of the fork and detail tuning their new Double Barrel rear shock.
One surprising note to mention in regards to their very successful headset sizing system (S.H.I.S) is that almost all headsets on the market have been narrowed down to 6 top bearings and 4 bottom bearings, making the system even easier. As far as changing the angle of the fork mentioned earlier, bowl-shaped cups hold the bearings that are placed in eccentric matching cups in the headset for several different angles that they include as one set, so you can try different combinations for better climbing or better descents, etc. Also, even with this new system, Cane Creek has a headset fit finder with a database of over 10,000 bikes already and adding new ones each day when submitted by mechanics and other in the industry. This is awesome as it compiles so much data from so many companies and locates it in one place, leaving the guessing game far behind.
The biggest highlight for me was a detailed summary of their 110 headset. From cutout diagrams, you could see the multiple seals keeping the bearings sealed up nicely and backing up the 110 year warranty. Essentially, it is waterproof and to me, rivals the Chris King headset that is also popular by name and by its own sealed system. I mainly think it is just good to have a choice of two almost indestructible headsets. Plus, regardless of which one it goes with, they will quickly replace it if you somehow are able to destroy it.
The Double Barrel rear shock is a great product to explore as well and has so many options for fine tuning without problematic issues that usually arise with other rear shocks with leaking, etc. Seal replacement was very easy and clear to understand and the hands-on experience of doing so really “sealed” in the information.
FSA:
FSA (Full Speed Ahead) was all about ensuring that their products get better and better and flaws and defects get smaller and smaller with genuine rider honesty of feedback and a willingness and commitment of the company to fix any problem. They were the first company to develop a carbon crank with longevity. Their SLK series has been continually refined with each season of testing as well as their Gravity line for downhill bikes. Being that they are located near Whistler and other major downhill areas, the testing grounds put the equipment and research through extreme trials to bring us what we have today. One cool addition for customer service was a placement of an office on the East Coast to help eliminate the waiting period of time zones to contact representatives. This creates a faster turn around and closer connection of rider to mechanic to rep.
They also have a headset that was developed much like the one I mentioned earlier with Cane Creek, but their point of interest was to develop one that had fewer parts and a more robust interface that could be depended on in harsh conditions. Great length was also taken to “creaks” and “clicks” in integrated bottom brackets, so naturally I wanted to turn a keen ear since I wrote an earlier article on bottom brackets and issues that arise. Several things like the correct materials for installing bearings and retaining them with loctites and compounds that wasn’t as clear before as to how essential it is to choose the correct one. Moving from so many different types of crank spindles and bottom brackets has led them to the development of their BB386 spindle and bearings that is the same size for all of their cranks. They make different qualities of these, but all of the are the same so compatibility is a non-issue.
Fox:
Fox seemed to hold a different approach than any other class. They split theirs into three separate mini-classes with hands-on working at each. The groups rotated and gained insight on several areas from bushing and seal replacement on forks to lockout tuning and rebound damper adjustment. The most useful in a business sense that they now offered is the bushing and seal replacement. Developing a new tool with Barnett’s Institute, it allows bushing replacement on any fork including Fox and passes the ability to do some services at the shop level rather than always sending it to Fox to have work done. This means that I can get a rider back out on the trail faster and that makes a happier rider.
After the first day of learning, I got to speak with the Fox rep at the social hour following the day. He showed me a suspension unit that is installed on the new Raptor off-road truck. I lifted it and it was quite heavy as trucks are far less concerned with being light rather than strong. It led to something that I wouldn’t have expected. He said that most people think that the bike fork technology and suspensions are derived from their larger parts on off-road trucks and ATVs, etc. He said that this was quite the opposite. The bike technology was hardest to innovate because it not only had to be really strong, but also light enough to ride and that this technology was what actually trickled up to ATV suspensions and then to off-road vehicle suspensions. Pretty cool. They also seemed to be having the most fun out of the other companies.
Mavic:
Mavic was, personally, a beautiful sight to see. Slick blacked-out wheels and carbon spokes all over the place with matching yellow hinting everywhere was the realm of high-end wheels and superior technology. Not only were several points of misconceptions I had cleared up, but it was also confirmation of several things I had been doing right.
Mavic has a philosophy that their wheels are made as a system from the center of the hub all the way to the ground — including the tire. This is why all of their wheels are sold with tires installed. From flashy animations of hub overhaul procedures to French dialogue speaking of dedication to ultimate advancement in technology, they covered essential procedures for replacing carbon spokes in two different wheels (R-SYS and Cosmic Carbone). Plus, the guys teaching the class were the guys that fix the wheels or rebuild them when we send one back for service. It was like finally meeting the guys who had done all the great work I see coming back in shipments and on display in the shop and getting a flavor of their standards and tips.
One thing that really stuck out that I didn’t know before was that they use mineral oil inside the freehub body with a bottom seal. Mineral oil, they said, wasn’t some magical liquid, but just that it was exactly the right “weight” to stay inside and give the freehub years longer of usage and, in its absence, is why some riders have described a high-pitched squeal at times on fast descents.
Shimano:
While much of the material that was covered in the presentation part of the class was what I had recently just finished training on, it was still reinforcing and provided confidence in the hands-on tuning of the new Dura-Ace 9000 drive-train. With its sleek machined appearance and unbelievably improved smooth performance, I have to contend that all three major companies (Shimano, Campagnolo, and SRAM) have narrowed the gap between each other and the game is at its highest level ever.
The new and improved cables and casing also surprised me to its superior feel and had me thinking they snagged the designer for the Gore Ride-On cables that were just discontinued. Coming now in seven colors, the PTFE coating is uniquely applied so wear doesn’t affect performance nearly as much as before, allowing riders to use them for longer with better results. The motto, “friction is the enemy,” really rang true here and great effort was placed into decreasing it and its effect on rider fatigue.
Summary:
All in all, as stated above, the technologies are getting more and more efficient and precise with faster rides and sexier designs. It’s going to be really exciting to see how far they can go in the next couple years.
– SNC