SRAM / Zipp Hub and quick release lever recall!!

Hey everyone, we were talking with Zipp this morning about a repair and found out that there is a newly released recall of most of their front hubs (88v6, 88v7, and 88v8) because of a possibly failing at the retaining ring that holds the spokes in the hub.  The description reads: “This recall includes SRAM’s Zipp bicycle wheel hubs. The model names of the affected hubs are ZIPP 88v6, 88v7 and 88v8. The Z logo is printed on the hub. The wheel hubs come in black, silver and falcon grey. The diameter of the clinch nut is approximately 1.46 inches. Some of the hubs were sold as part of wheel sets installed on new bicycles. SRAM will post a list of affected bicycle brands and models on its website at www.sram.com.”

The link for this recall is here

Also, several minutes after seeing it posted on the CSPC site, they posted another recall for their quick release skewers. Only quick releases without a marking at the center of the underside of the lever are included in this recall.  The description reads: “This recalls involves SRAM’s Zipp stainless steel or titanium quick releases. They were sold as aftermarket components or as part of the 202 DB V2, 303 DB V2, 404 Firestrike V2, 202 Firecrest V3, 303 Firecrest V3, 404 Firecrest V3, 808 Firecrest V3 or 808 NSW wheels. The quick release has a curved, black lever. Zipp appears on the lever. Only quick releases without a marking at the center of the underside of the lever, below the Zipp logo are included on this recall.

The link for this recall is here


Feel free to drop by the shop with your wheels so they can be processed as soon as possible with the season starting up!


SRAM eTap Actual Weights

About a week ago, we finally got all of our SRAM eTap groupsets in the shop.  We got six full groups out of the first batch of twelve to hit the US.  They come with the wireless components (derailleurs and shifters), a Quarq power meter crank, and SRAM Red brakes, cassette, and chain.  Out of the groupsets, two were TT eTap groups, which have the wireless ‘blips’ that actuate the derailleur like the paddle on the shifter.  I will be posting a good installation article that goes more in depth than the initial article I wrote on eTap.  In the mean time, I thought it would be cool to have some photos of the components and their actual weight.  Pretty light stuff and I really think it will be a popular option.

WP_20160206_11_49_48_Pro
SRAM eTap Rear Derailleur
WP_20160206_11_50_38_Pro
Interchangeable battery for SRAM eTap
WP_20160206_11_50_39_Pro
Interchangeable battery for SRAM eTap
WP_20160206_11_50_51_Pro
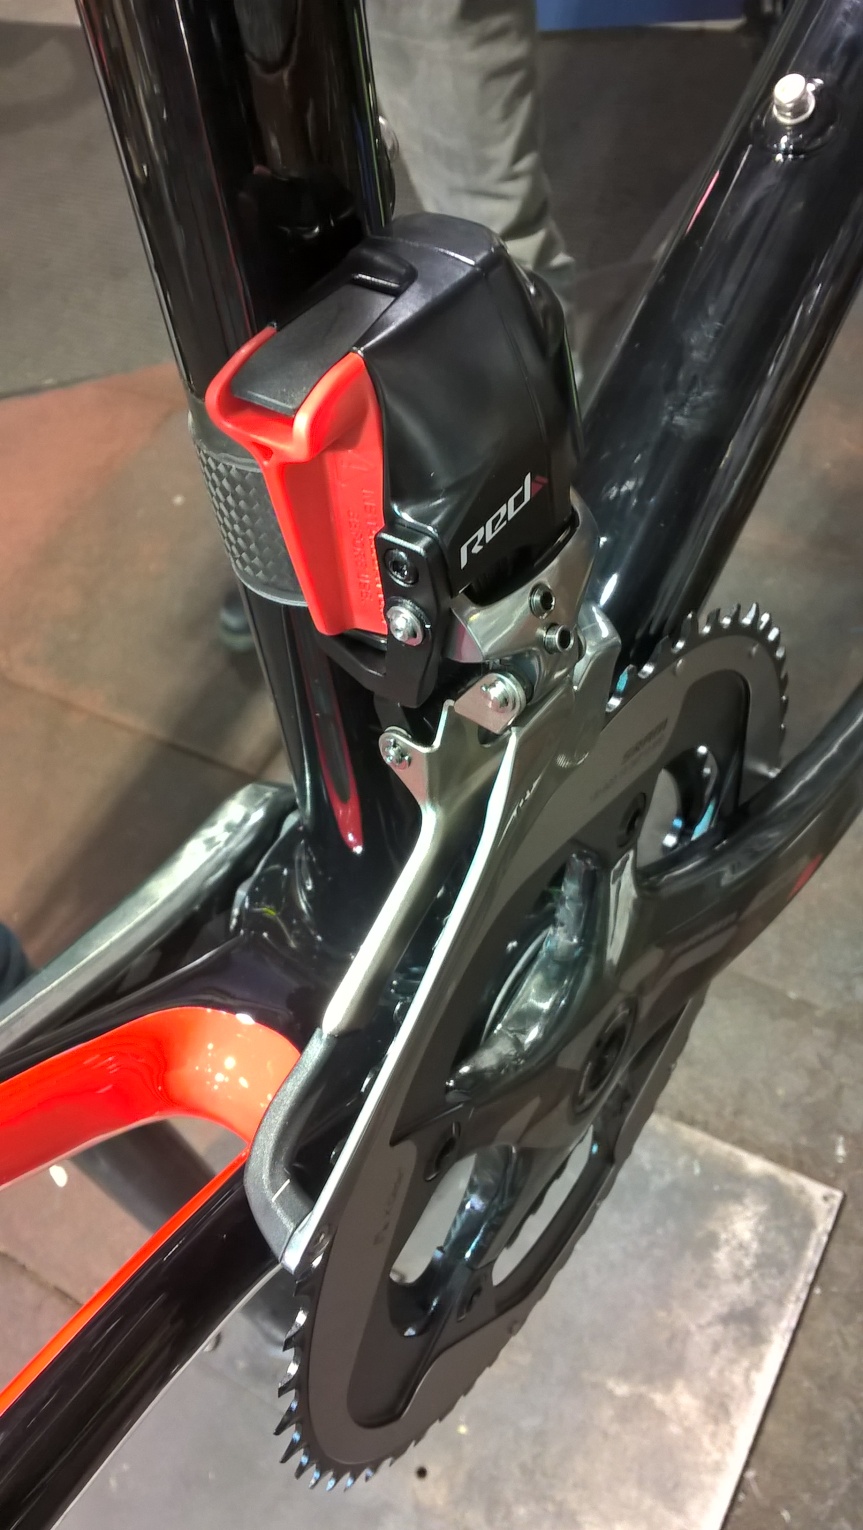
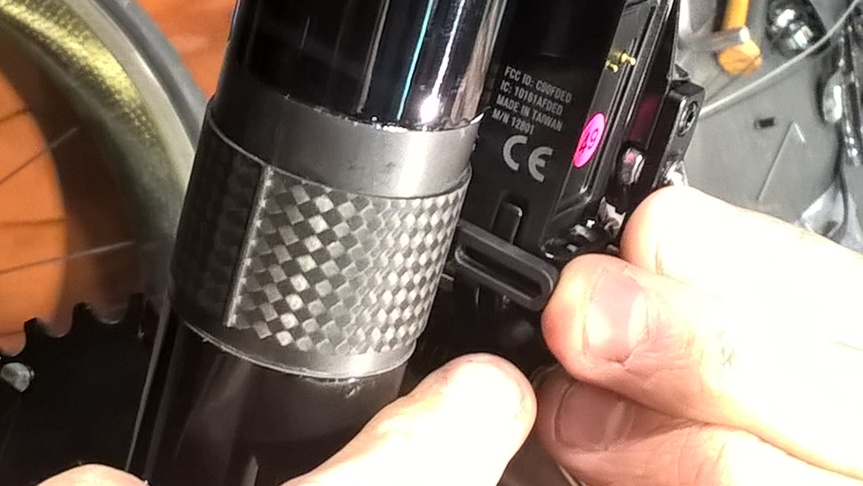
SRAM eTap Front Derailleur
WP_20160206_11_51_20_Pro
Left SRAM eTap Shifter
WP_20160206_11_51_27_Pro
Both SRAM eTap Shifters

265 grams (Shifters), 160 grams (Front Derailleur), 238 grams (Rear Derailleur) = 663 grams.

So, after seeing the weights, I obviously wanted to see what the comparison was with Shimano Dura-Ace Di2 9070.  Here it is

230 grams (Shifters), 107 grams (Front Derailleur), 214 grams (Rear Derailleur), 50 grams (Battery) = 601 grams.  I am pretty sure that while the wires do weigh something, it’s not hardly enough to make it heavier than the eTap (maybe if you use 1000mm wires for all of the bike, haha).  So, while eTap is slightly heavier, it is not by much.  If you look at cassette, brakes, and cranksets (not a Quarq), chain, and bottom bracket, it is still lighter than Dura-Ace by almost a hundred grams.  This savings is almost entirely in the crank and cassette weights.  Anyways, hope this shed s a bit more light on the newest groupset.  I am also anxiously awaiting more photo leaks of the new Dura-Ace 9100, which looks to be wired, but will have an A Junction that can be updated and adjusted wirelessly.  That is a way more efficient way of easily checking firmware and diagnosing issues.


SRAM eTap – It’s etapular!

Hello everyone!  I was able to cover and help with our first SRAM eTap build in the shop for our SRAM rep and I will tell you it is a force to be reckoned with.  They have really thought out the design completely and it works very well.  Plus, having only the brake cables running from the bars to the frame is looking so clean and fresh.  Swappable identical batteries are a big plus if you run out of juice (approximate life is 1000km or so).

The build itself is ridiculously easy and the Parlee frameset was made for eTap (no frame fittings except the rear brake).  With only an internal brake cable to route, it saves a lot of time.  Pop on the front and rear derailleurs.  Pop on the shifters. Sync up the system in about a minute or less and you have a working electronic drivetrain.  Pretty awesome.  In addition, it is great to see a derailleur off the bike on the counter fifteen feet away and actuate it while a customer is checking out.  They’ll think it’s possessed!

Here are some photos of the build (what little there is) and then a couple videos of the derailleurs in action.  To shift the bike the left paddle controls shifting the rear to a higher gear and the right paddle controls shifting to a lower gear in the rear.  Pressing both paddles shifts the front up or down depending if you are on the large chainring or small.  Charging the bike takes only about 40 minutes.

Actually, the videos are more interesting than the photos.  Here they are, photos below that.


The above three videos are of the derailleurs actuating wirelessly from the the shifters.  Pretty awesome and syncs easily.  Press the small button on the rear derailleur to start sync.  The LED below the button will start flashing.  Proceed to press the same button on the front derailleur and it will also flash.  Last, sync each shifter by pressing the same little black button on the inside of the shifter paddle.


WP_20151124_17_25_29_Pro
SRAM eTap rear derailleur without battery
WP_20151124_17_25_43_Pro
SRAM eTap rear derailleur with battery placeholder
WP_20151124_17_25_55_Pro
Front view of the SRAM eTap rear derailleur.  Note the little black button sticking out right at the bottom for syncing the components.
WP_20151124_17_41_50_Pro
SRAM eTap front derailleur with battery placeholder
WP_20151124_17_42_01_Pro
Limit adjustment screws on the front derailleur
WP_20151124_17_42_18_Pro
Rear view of the SRAM eTap front derailleur
WP_20151124_17_43_46_Pro
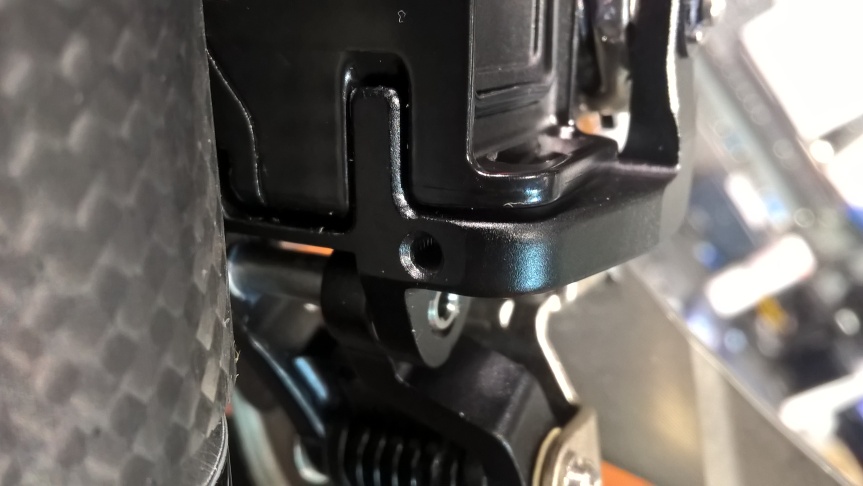
SRAM eTap front derailleurs use a support wedge to stiffen the actuation of the component. Contrasted to Shimano’s support screw in design, but both are easy to install with a set screw anchoring the wedge based on the angle of the cage.
WP_20151124_17_44_16_Pro
Wedge screw anchor threads.
WP_20151124_17_44_56_Pro
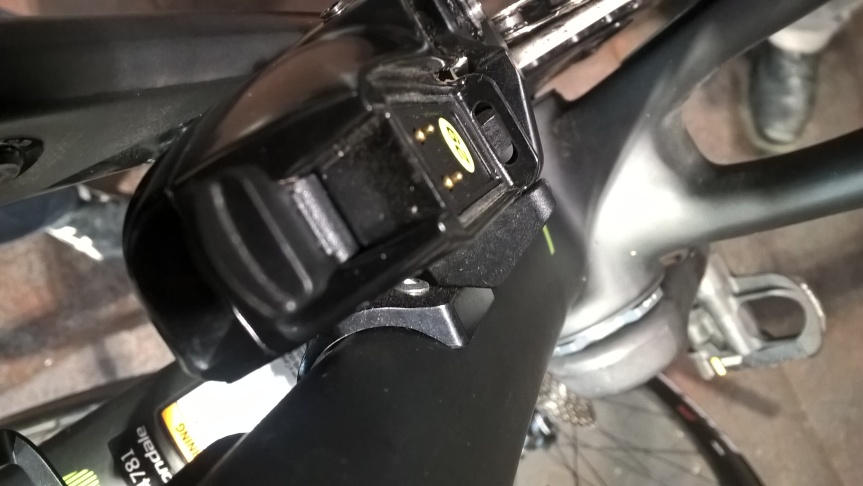
Top view of the SRAM eTap support wedge.

WP_20151124_17_45_06_Pro

WP_20151124_17_53_57_Pro
Most of the brains for the system are housed in the rear derailleur.

I hope you’ve gotten a good first insight into the new SRAM eTap system.  More will follow as we work with it more and any hacks will of course be shared.  Thanks for reading and checking out the videos and photos!


What was in the stand yesterday (and today)?

So I had a rather interesting limited edition bike come through the shop for an appointment for general servicing and, as some projects occasionally do, it had a complication that was a good call for photos and explanation of a component that shifts the bike through an internally geared hub developed by SRAM around 2006 called an iMotion 9 hub.  It has nine gears or varied range and changes the gearing with moving the chain.  A wire cable runs from the inside of the hub to a long barrel adjuster and then up the frame of the bike to the shifter. The bike is a limited run of commuter style Cannondale hybrids with a Headshock lefty fork and no non-drive side chain or seat stays, hydraulic quad piston brakes, slick commuter style tires, and a fully enclosed chain.  Take a look:

WP_20150504_004

The client mentioned shifting issues, which usually happens with most bikes as the cables stretch.  Tighten them up to the correct tension and the cable pulls the gears in the hub into an easier or harder gear each time you twist the shifter (smoothly and quietly).  I initially installed a new cable and with a bit of a learning curve and several adjustments of cable length (pretty specific without using up one of the two available barrel adjusters)(I would also mention maybe trying an additional one as an inline adjust about a foot from the shifter).  I went to test it outside (where it was much nicer) and after sever shifts I noticed the cable went slack so I felt the shifter and could feel a bit of play in the cable and stopped the bike.  Once back in the stand, I noticed something I had not previously seen due to it’s hidden position behind the chainguard housing.  A crack in the entry point of the cable into the hub had separated about half of it’s cylindrical length (about 7mm).

WP_20150504_002(This is inconveniently located in my photo underneath the greased up axle bolt.  I will take a photo of the fixed piece or possibly the still broken piece if I can’t repair it today.)

This part is made of plastic and, after a bit of research, I realized that apparently none of these parts are sold separately, even in the normal version of this hub.  This is when a little fabrication and small detail work will hopefully save the day.

I took apart the wheel and have opened the hub to examine any other issues and make fixing the piece much easier.  A little epoxy was applied to both pieces after greasing the cable running through (proprietary piece of cable that can’t be removed) so I can reinforce it with a collar of sorts today.  Here are a few photos of the hub being taken apart.  The spring in the third photo will likely be a challenge to get back into the shell, but can be done with a bit of concentration and effort (and persistence). The first photo shows the plastic threaded piece coming out from the circular housing.  The spring keeps enough tension on it in the photo to join the broken piece with the rest of the body, but moves significantly under load.

I will take a few more photos today and update the situation in tomorrow’s article.  It’s supposed to hit the upper 80’s around DC today.  Make some time and go for a ride!  I will certainly be taking thorough test rides after tuneups today.  Follow @pixalias on Twitter for updated photos and good tech that rolls through the shop!

Specialized Turbo S Long Term Review

Welcome to the long awaited review of the Specialized Turbo S.  The “pedalelec” is an electric pedal assist bicycle for those of you not yet hip on such terminology.  From a newly updated control interface (what you use to configure the Turbo) to a more powerful battery, this bicycle can go about 40 miles at 30 miles an hour.  For locals that know the DC area, that would be like coming into the city from here:

40 miles on 66However, it certainly never takes the quoted 41 minutes by car unless it’s 11:28 pm on a Thursday night (according to googlemaps).  The great news is that you’ll never have to spend all that time sitting in traffic if you’re flying down the taxpayer supported trails of the greater Washington DC metro area or wherever you might live.  It’s a bike that leaves everyone smiling the first time they use one and was designed for commuting and recreation by some of Europe’s best bicycle experts with Specialized.  Every single person I have ever seen test ride or own one is smiling ear to ear afterward.

Group ride bikes lined up in three sizes, S, M, L

This review intends to convey the nature of the bicycle and how it operates as well as issues encountered from a maintenance standpoint over a long period of usage.  I would be the first to admit that, amongst a few expected difficulties, it is a machine worth the investment and is a forefront in the future of this class of bicycles.

Building a Turbo out of the box is not altogether difficult and can be done by most shops with some attention to detail and a thorough reading of the manual.  You might recall from my original article that I attended a seminar on how to operate and work on the Specialized Turbo in Miami back in 2013 and it definitely helped to have time properly set aside to fully understand how it works and how to replace components and fix others in the past few months of research.  With a final recent repair of the regeneration mode activated hydraulic disc brakes by Magura, I felt there was sufficient photos and information to write a good “one-stop” informal manual in case you run into a similar situation.  As started, the build includes normal things like truing the wheels which are installed on the bike with thru-axles and have torque specs located right at each point on the frame and fork.  These specs are important as this bicycle will undergo higher stresses than a majority of other bicycles at higher speed.

So, all of this being said, i think that it’s clear how cool and fun these bikes are to work with and enjoy.  There are certain maintenance issues that seemed to take a fair amount of time to work out, but most of the solutions made great sense after diagnosing and repairing.  I would like to begin by saying this quick procedure, found in the manual, solves many small issues:

1.  Power off the Turbo by lightly clicking the green lit button on the battery.

2.  Turn the key included with the bike down near the bottom bracket and hold.

3.  Lift the battery out from the downtube.

4.  Wait about thirty seconds.

5.  Place the battery (bottom first) and reinstall.

6.  Turn on the Turbo.

Essentially, taking the battery (powered down) out of the Turbo resets the entire system much like unplugging your Internet router at home or work and powering it back on after a few moments.  Every time it starts up, the Turbo passes through a set of diagnostic checks that relay to four small LEDs located right below the power button on the battery.  Each LED should blink once and then remain on until all four have lit up.  Then, all four LEDs should blink together once and then resolves into a battery level meter (each LED represents 25% battery).  If the LEDs have lit up as mentioned, the system has just checked the battery status, the motor status, the control interface status, and the lighting system status.  On the current Turbo S (versus the original model), there is a front light as well as a new integrated rear set of LEDs on the back of the saddle (nice addition).

Turbo Battery

However, at times throughout the research, I would notice one or two LEDs blink twice when the Turbo was turned on and so I checked the manual and diagnostic chart from the Specialized Service website.  Any of the four LEDs blinking twice indicates that there is some sort of fault or error with the corresponding module (battery, motor, CPU, or lights).  The lights and control interface (we’ll call it the CPU) are wired in parallel and it should be mentioned that a fault (LED blinks twice) from either might mean checking both for error.  This has happened on several occasions and could always be resolved, but a check of both modules was usually necessary.  The number one thing I found helpful to do in the case of an error was to immediately check all of the wire connections on the bike to make sure they were properly tight and paired.  In some cases, I found it helpful to use a very small amount of dielectric grease to ensure that the connection was consistent.

From all of the repairs, I have installed or replaced the following: the battery (both the same unit and upgrading the original Turbo with a new unit), bottom bracket (BB386EVO), rear derailleur (SRAM X0), hydraulic brakes (Magura), and the CPU (both updating firmware and software and installing a new unit).  One thing I have never had to replace (on a Turbo) is a spoke.  The wheels were designed and built extremely well and the Specialized Electrak tires are perfect for the bike.  Many other electric bikes I have serviced have experienced spoke breakage and warping of the rim.  As a part of the bike that most people cannot repair on the road without training and tools, it’s a great confidence to know they hold up so well, even with daily commuting, running errands, and several crashes.

I am going to add links below for each section of the review (two additional parts) for ease of navigation.  Once the link is active, the post for the corresponding link will be up.  This way, it’s easier to jump to a section if you are servicing a Turbo and can read the most relevant information.

Parts Installation (Active)

Diagnosis and Troubleshooting (Active)

SRAM Road Hydro Disc Install & Review (New) & Pinarello Dogma F8 Frameset Unveiled

I thought I would write a review of how to install and adjust / bleed the newest road hydraulic disc components from SRAM (the SB700 series).  They just arrived at the shop a few days ago and I was anxious to see what the differences were and how they would perform once installed.  As normal, there were some easier parts and more difficult ones and I am sure I will encounter new challenges with it for each new frame it’s installed on.

This review is based off of a popular frame — the Specialized SWORKS Crux.  It’s cable routing was designed to use road hydraulic brakes (or mechanical) and was the first one in the shop to be updated.  Here goes.

This is the group right out of the package.  This is the SB700 series and it also came with Zipp Service Course SL tape (black), new rotors/pads, and caliper bleed blocks.

The Shipment New SRAM Hydro  The S Series CaliperThe S700 hydraulic road lever

The front and rear setups were in separate boxes and packaged well.  The only thing that I would have liked to have seen would be a printed copy of the bleed procedure.  However, I did find it easily online here

This bike stayed in the shop from the initial recall and so removal of the recalled hydraulic brakes was fairly quick and easy.  I cut the lines for the rear brake because of the internal routing and pulled the line through after installing this little connector and hose plug to avoid DOT fluid dripping through the frame.

The first thing I did was to clean all of the surfaces the components would be installed to with isopropyl alcohol.  This leaves no residue and provides the cleanest contact surface.  Before this, I also disconnected and removed the old derailleur cables.  Installation of the brake/shift lever is next and was mounted using a small amount of grip paste behind the handlebar mounting bracket to ensure stable placement and zero movement while riding.  Photos below.

Installed rear lever Old lever marking for replacmentInstalled rear lever


Once the lever was installed, I checked out the caliper to notice any differences.  These next photos are of the caliper installed and on the bench.  I figure it is more useful to know as many things as possible before the install and some of these things were discovered throughout the installation.

The caliper beside the diagram of parts The removable hose / barb/ olive for trimming 92 Caliper brake pads Bleed block


In the above photos, you will notice that the caliper looks about like any other hydraulic caliper out there with a few minor differences.  First, the hose can be cut and sized for the frame at the banjo.  Where older style brakes seemed to always have the crimped metal cap on the hose where it meets the banjo on the caliper, there is a standard 8mm fitting bolt that compresses an olive and barb into the body of the banjo.  Secondly, the pads are uniquely shaped compared to other SRAM/Avid brakes.  Lastly, the safety retainer clip for the bolt that hold the brake pads in the caliper is clipped on the inside of the body, where the edge of the pick is pointing in the second photo.  As a side note, I just realized the potential to use the bleed block as a tool to hold the hose while installing a barb by squeezing the end of the bleed block that is slotted.

Next, the front caliper was installed and appropriate measuring for the hose was fitted for the frame.  I used the smaller cylindrical caliper mounting spacers and found it to look sleek and minimal while providing a stable “post” for the caliper to mount to.

Brand new rotors Installing the front caliper  Installed caliper and rotor on front wheelEasy hose cutting and sizing


Cutting and sizing the hose for the front brake was relatively easy and required about the same time as it does for a mountain hydraulic brake.  With no internal routing for the front brake, it simply passes in a nice arc in front of the head tube and follows by a retainer clip on the fork down to the caliper.  Pivot washers and new mounting hardware were all included (a 12mm top spacer and a 7.5mm bottom spacer for a 140mm rotor)(A standard adaptor was also included for a larger rotor).

Now, I’ll cover the installation for the rear brake and then go over the bleed procedure last.  The rear brake hose, as mentioned earlier, is routed through the frame, below the bottom bracket to the non-drive side of the bottom bracket cable guides for the derailleur cables, and out of the rear non-drive chain stay to the caliper.  The caliper mounts directly to the frame mounts along with pivot washers.

One of the important factors in internal routing for hydraulic hoses (and full-length housing) is being able to wrap cushioning around it to prevent rattling in the frame every time the bike hits a bump.  Specialized had provided a spiral foam insulator that was wrapped on the excess of the hose and pushed into the frame where it passed below the bottom bracket (shown below)

The bottom of the photo is where the insulator is pushed into the down tube.  It is incredibly helpful to use some sort of snaking light to illuminate the inside of the frame so the derailleur cables can be checked for crossing when installed (also internally routed).  It’s an easy thing to miss with all of the other focus points of the install and will definitely lead to terrible shifting.  I left the hose for the install as long as possible (cutting it about two inches from the banjo on the brake caliper) so there would be plenty to use for correctly sizing to the frame.  I would note that gloves are definitely useful and necessary while routing the cable so no DOT fluid contacts the skin.

Cable liners routed for derailleur cables Hose plug and tool for routing through the frame Installing new barb and olive onto the cut and sized hose The installed caliper before attaching the hose Rear rotor (and still works for racks on bikes)

The routing through the frame wasn’t as difficult as I thought it would be since the hose was fairly rigid and could be easily seen with the light shown into the frame. Using the little red plug also marginally helped to prevent lots of air from entering the system while installing, which made bleeding the brake quicker and more effective afterward.

The pads lined up to the rotors well for the front and rear.  The pad spacers were held in place well and resisted falling out (great for packing and transporting).  Before bleeding both brakes, I went ahead and installed the derailleur cables back onto the components and adjusted as necessary.

Once the rotors, levers, shifter cables, hydraulic hoses, and calipers were all installed, it was definitely evident and expected that one or two bleeds would be required to get the correct actuation of the lever.  Initial pulls on the lever yielded solid piston movement in the caliper — even with air in the system.

The bleed procedure is quite normal and easy.  The bleed port on the lever is located at the topmost section of the grip, underneath the rubber.  A standard T10 fitting right in the center connected to a 1/4th filled bleed syringe with DOT 5.1 fluid and a hose clamp.  The inner part of the caliper body bolt is the second fitting (also T10) for the 1/2 filled syringe of DOT 5.1 fluid with a hose clamp.  Past this, the bleed procedure is described in depth, step by step at the link mentioned at the start of the article.

Lever bleed port T10 Caliper bleed port T10 Remember this clip! Bleed manual off of website for Road Hydraulic


A few things to remember — clean the entire caliper with isopropyl alcohol after bleeding the brake and before reinstalling the brake pads.  Use the included bleed block.  Do not forget the clip for the retainer bolt on the caliper that holds the pads in place.  While not critical for the brake to function, it is a safety clip so the pads do not vibrate out and cause the pistons to contact the rotor in the event of a failure.  Lastly, always go through the bleed procedure step by step.  As noted in the manual, it may be necessary to bleed the brake more than once for the initial install.  I bled the rear brake twice and the front brake once (due to less air exposure than the rear and great results after the first bleed).

I checked the position of the brake pads in relation to the rotor and centered them on either side by loosening and tightening the mounting bolts and placing a white sheet of paper below the caliper (which makes it incredibly easy to see the space between each brake pad and its respective side of the disc rotor).  Once fine-tuned, I test rode it around the area outside our shop and was noticeably impressed.

The shifting performance felt better than the original hydraulic version and slightly better than the mechanical 22 groups.  The brake pads were burnished to the rotors with about 40-50 hard stops and responded quickly to fast braking and slower modulation.  The reach can also be adjusted for quicker pad contact and shorter distance to the handlebars.

All in all, I thought the install took an appropriate amount of time and was well prepared for by SRAM.  The bleed procedure is quite like their mountain brakes, which is easy and was convenient to perform with a brand new bleed kit included with each set of brakes.  The braking power was solid and adequate.  I’ll be awaiting real ride feedback from riders picking them up as I finish installing the others.

Please let me know if you have any questions or comments regarding this article or in your own install as I am always looking to expand the knowledge base to provide accurate instructions and review.  Thanks for the support!

– S.N.C.

As a final note, we also just got a shipment of the new Pinarello Dogma F8 — an incredibly light frame with post hardware rolling in at about 980g!  Below are photos of the frame before the build and I’ll have build photos in the next week as five are already getting ready to head out to the road for takeoff!


This slideshow requires JavaScript.


Specialized Turbo Launch

Well, I am pleased to be back with some spare time to post on the blog and interest you in an event I was at yesterday for the Specialized Turbo electric bike launch and certification.  It was a one day training session and test ride experience in South Beach Miami.  In a quick word of summary — this is the first bike I can correctly term “fast.”  With moderate exertion, we were quickly flying around the city streets with ease and style at 30 mph.

Here are a few photos I took throughout the day.  Below the slideshow is the review of the components so you’ll be more familiar with what they look like and how they function.  It is quite an all-inclusive package with sleek sexy accents and smart technology that flows right in sync with today’s popular commitment to helping the environment and being productive with technology.

This slideshow requires JavaScript.

The day started with a quick summary of how to operate the controls and what to expect.  Then, we rode!  SRAM 1×10 configuration with some incredibly robust Armadillo Elite Electrak tires.  In the “most fun” mode, or full active mode, the bike can attain a speed of 45 kph (30 mph) for an entire hour!  This means, of course, that I could make the 25 mile commute to my work using the pedal assist motor to give the bike double the watts I push into the pedals and make it there in under an hour.  That’s fast.  That’s the Specialized Turbo.

I am really convinced that this design and research has led to a frontier of true “hybrid” bicycles that can realistically be used by anyone and eliminates gas usage and adds great daily exercise.  What about group rides?  Never wanted to join because of the “fast pace” and limitations of keeping up?  This bike allows you to join even an A group ride.  From every other electric bike so far, we’ve seen many drawback, problems, and general “clunkiness.”  This bike specs out at 50 lbs, which is about ten pounds lighter than previous electric-assist bicycles.

The battery is probably the most innovative of all the electric bikes out there.  instead of it being bulky and oddly placed into a rack or after-market mounted to the frame, it integrates directly into the downtube.  This means it becomes part of the bike, with an adjustable cushioning plate to take up small bits of play, which enables easy installation/removal.  The Lithium ion battery is custom designed by Swiss manufacturing and features a unique cell holding grid for the battery so vibrations, bumps, and weather do not impact the performance.  It can operate down to almost 4 degrees Fahrenheit and up to 120 degrees Fahrenheit.  With a built-in diagnostic tool that indicates successfully test and operation of the individual components of the electric motor system.  It also can be used for a rough battery meter indicator — secondary to the much more accurate meter displayed on the integrated computer.  You might be getting the feeling that this bike sports a lot of integration and ergonomic design.  You would be right.

The computer is the central unit for displaying important information about the status of the bike.  it can tell you the normal things a cycling Speedzone computer can from Specialized like temperature, time, speed, and distance.  It also, as aforementioned, displays battery life and modes the bike can run in.  From full active power, which adds the same watts as you input (ex, 200 watts = 400 watts total) to “eco” mode (adds 30 percent of the power you input) to no assist to regenerative mode (recharges the battery), there is a variety of function and usefulness to appropriate your battery life for just about any reasonable commute (anything under about 30 miles).  The eco mode will allow the rider to push their own way with a little support on the parts of riding that need more torque.

A brushless DC motor operates the propulsion of the added power with no moving parts inside and was custom designed from the ground up by the Swiss motor company Go Swiss Motor.  In conjunction with Specialized’s headquarters for the Turbo project in Switzerland, they made a slightly smaller motor than most that exist on electric bikes today and encased it in silicon to make it weatherproof and immersible.  So, a slightly heavy battery, a heavy motor, a rider, and added robust frame design are adding up in weight, which increases the power needed to stop — particularly when you are flying 30 mph down the road.

That leads to the brakes.  Magura MT-8 disc brakes are installed on the Turbo which have incredible stopping power and work great with 160mm rotors front and rear.  A quick side note is that, on the rear wheel disc rotor mount, the rotor bolts used need to be a bit shorter than standard ones.  They use an M5x7mm bolt rather than the normal M5x10mm bolts.  This means either shorter normal ones properly or order sets for spare parts. The most creative aspect of the brake system is the connection to the motor to disengage when the lever is actuation (pulled).  That means braking under just the weight of the bicycle and you rather than that and working against the motor.  Some electric bikes out there have this feature.  However, Specialized took it a step further.  they included the system to be able to regenerate the motor every time you actuate the brake lever.  Even if the pads don’t fully stop the wheel or even make full contact with the rotor, the regeneration mode engages, slowly building and conserving battery life.

In addition to all of this, the bike has integrated lights in front and rear that makes night commuting and riding a breeze.  They work off of the battery to a nominal degree and can be turned on at the light or on the integrated Speedzone ANT+ computer.

This bike really is it for the “car replacement” category of cycling as well as the elite tech savvy crowd interested in the futuristic design and seamless technology interface.  30+ mile rides, 30+ mph speeds, stable flat-protected tires, innovative and pleasing design meant for ease and efficiency, and simply a thrill to ride, the Specialized Turbo was everything I expected it to be and being trained on the servicing and operation by the individuals who actually designed the bike made it a memorable and focused learning experience that will certainly propel my shop to promote its use.  I am sure you’ll be asking one question throughout this whole review.  How much is it?  They retail out at $5,900 dollars.  That’s more expensive than many used cars out there.  It’s tough to justify the expense.  So, I calculated the cost of what a car costs a year paid for and what it cost the average driver in a car with payments.

25 Mile commute -One full tank of gas every two weeks = $52.00 x 26 fill ups a year =  $1352.00
Car insurance payment = $75.00 x 12 months a year = $900.00
Standard maintenance factor = $300.00
Personal Property Tax = $200.00

Grand Total = $2752.00
Now add in 12 months of a $250.00 car payment.  That then equates to $5752 per year.  That’s basically the same as the price of the bike.  And, it will certainly last you more than a year.  From the robust construction, I would guess the bike will ride great with very basic mechanical maintenance for several years before even the battery would need replacing.  Consider the benefits.  I hope you enjoyed a review of the Turbo.  It was really an awesome bike to ride and we will have them in our shops very soon so you can stop by and test ride one yourself.  I guarantee you’ll step back into the shop afterward grinning from ear to ear.  Feel free to email me or comment with questions.  I would be more than happy to answer them or find it out.

– SNC

Sworks Tarmac SL3 Rebuild

A project that has been in the shop for a few weeks has finally been completed and I wanted to share some photos and background that I believe really details what the cycling industry is about.  This Specialized Tarmac SL3 had been in a crash during the prior year and it was questionable as whether to replace the frame and wheels or repair them.  Weighing in originally at just over 13 pounds, it was equipped with SRAM Red, Zipp 202s, and Specialized components.

Upon inspection, it was evident that the rear chain stay had a major break in the FACT 11r carbon fiber and the other stay would likely have been compromised from the impact.  In addition, the rear wheel was destroyed as well as the fork.  We consulted both the costs of a new frame and wheels and with a company out of North Carolina called Jack Kane Cycles that could repair the carbon.  They assured us after sending multiple photos of the damage that it could be repaired, but that a new finish needed to be applied to the whole frame for aesthetics and durability.  After debating about this issue in the shop, it really made good sense.  At Kane Cycles, they believe that a repair in carbon fiber means making the whole system complete as a skeletal structural unit.  It should essentially look like nothing ever happened.  After sending them the frame and a replacement fork, they matched the paint and finish and repaired the damage with impeccable quality work.  I highly recommend their services and very much appreciated their updates and professional attitude.

While the frame was being repaired, we decided to use the hubs from the Zipp 202s and rebuild them with Sapim CX Ray spokes and Alchemy TB-25 tubular rims.  Alchemy machines a variety of hole drilling for their rims, which made it an excellent choice along with the great reputation they have for quality products.  The spoke calculations made it the hardest set of wheels I have ever laced.  From spoke nipple washers to measuring spoke length for recessed straight pull crossed and radial lacing to mounting the tubulars, it came together absolutely even and precise and dropped almost a hundred grams off the original set.

The rest of the bike suffered no damage in regards to the components, bars, and crank.  After cleaning and lubricating all of the parts, I installed Teflon shift cables and housing with long tongue protectors and put the sweet machine back to racing performance.  With Look Keo pedals installed, it weighed in at 14 pounds 11 ounces.  After a quick test ride, I realized that the industry was at a point where the technology is at the same level as our ability to repair it.  The bike is different today than the original, but now reflects a much more customized look and feel with a “one-off” style.  I plan to write a followup post later concerning the building of the wheels and how to measure for such a situation.  Here are the photos!    – SNC

This slideshow requires JavaScript.